Collecting Content in Enterprise Archive
In the Collect workspace, users or reviewers have to perform a search to view the documents. The documents do not populate automatically based on a configured case. Once the documents are available in the Collect workspace, users or reviewers can perform the required case actions.
Collecting a case allows you to collect and place conversations on legal hold.
Conversations that are placed on hold are not deleted from the archive even when the applicable retention policies expire.
The conversations are displayed based on the permissions set under Role and Permissions.
If Full Archive Access is set to Allow, case restrictions are not applied and all conversations are displayed. That is, t he Full Archive Access permission overrides the set Case Restriction.
If Full Archive Access is set to Deny and Update Case Restrictions is set to Allow, the conversations are displayed based on the Case Restrictions and Custodian list defined while creating a case.
If both Full Archive Access and Update Case Restrictions are set to Deny, the following error message is displayed while performing a search in the Collect workspace:
Please define Custodians or Case Restrictions for the search to be allowed.If Full Archive Access is set to Deny, ensure that either Update Case Restrictions or View And Update All Cases is set to Allow to view conversations in the Collect workspace.
The actions that can be performed from the Collect workspace are:
|
Export |
Allows the user to export conversations that are listed in the documents panel. Refer Exporting Conversations for more information on how to export a conversation. |
|
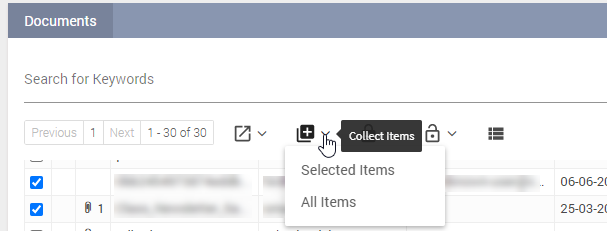
Collect Items |
Allows the user to add conversations to a case without placing them on hold. The collected conversations can be identified by the collect icon. |
|
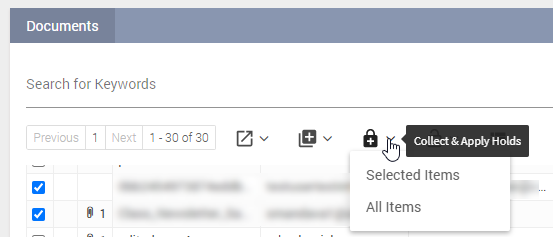
Collect & Apply Holds |
Allows the user to add conversations to the case while placing them on legal hold. |
|
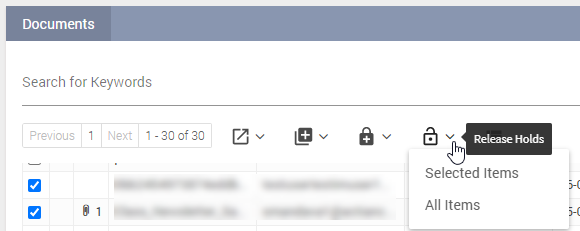
Release Holds |
Allows the user to remove legal hold from conversations. |
|
View Jobs |
Allows the user to view the status of the actions that have been performed from the case management workspace. The following fields are availabe in the jobs status page:
|
To collect a case:
Select the Case Management tab.
To select a case, click the Name & Description of a case listed in the Cases pane. The Case Summary (Overview) of the selected case appears.
Click the Collect link from the Case Management workspace.
Select the Search tab in the Search Archive panel. Refer the Case Management Search when DLM is Disabled section to understand the search functionality.
The search results appear in the Document panel.
The Document panel displays the following information for each conversation listed:
Fields
Description
!
Indicates if the conversation is marked as high importance. If you see the
 icon, it means that the conversation is marked with low importance.
Attachment
Indicates if the conversation has attachment(s) within it. It also displays the number of attachments.
Subject
The subject of the conversation.
From
The person who has sent the mail or initiated the conversation.
To/CC/BCC
Indicates the participants of the conversation
Date
The start date of the conversation.
Network
The network used to communicate.
Channel
The channel used to communicate.

Indicates conversations that have been added to the case.

Indicates documents that have been collected and placed on legal hold.
To select a conversation select the check box against it.
Select one of the following:
Click Collect Items on the Conversations panel, to add conversations for review. You can either add selected items or add all conversations as shown in the following image.
or,
Choose the option Collect and Apply Holds to add conversations to the case and place them on legal hold . You can either hold selected items or hold all conversations as shown in the following image:
The selected conversation is put on hold and a lock (
 ) is visible under the Hold column for that conversation.
To check the status of the conversations that you have put on hold, click the (  ) View jobs icon. The Jobs Status panel appears and displays the status of the actions performed.
Important
The count of actual collected documents may differ from the initial search results that was submitted for collection for scenarios such as:
Search results containing duplicate documents.
Disposition has occured while a large collect operation is in progress (> 3 hours).
In such cases, refer the Jobs Status pane for more information regarding failures.
The # of documents total count may fluctuate during a large collect request action. The final accurate count will be updated once the job has been completed.
Removing Conversations from Hold
To remove conversations from hold:
Perform a search for documents that are on hold by enabling Only held conversations filter under Holds in the Search Archive.
Select the documents to be released by clicking the corresponding check box.
Select one of the following:
Click the Release Holds (
 ) icon on Selected Items in the Document panel, to remove selected conversations from hold.
Click the Release Holds icon on All items to remove all conversations from hold.
Enterprise Archive allows you to refine search results with respect to participants, networks or communication channels