Reviewing Content in Enterprise Archive
You can review only those cases that are in the collected and collected and held state. Therefore, it is important to collect the cases that need to be reviewed. For procedural details to collect a case, see Collecting Content in Enterprise Archive.
Reviewing a case involves the following processes:
Searching Held, and Collected Conversations
Uncollecting Collected Conversations
Exporting Collected, and Held Conversations
Selecting, Adding Notes, and Tagging a Conversation
Placing Collected Conversations on Hold
Releasing Held Conversations
Searching Held and Collected Conversations
To search held and collected conversations:
Select the Case Management tab.
To select a case, click the Name & Description of a case listed in the My Cases pane. The Case Summary (Overview) of the selected case appears.
Click the Review link from the Case Management workspace.
Select the Search tab in the Search Archive panel. Refer the Case Management Search_OLD section to understand the search functionality.
The search results appear in the Document panel.
The Conversations panel displays the following information for each conversation listed:Fields
Description
!
Indicates if the conversation is marked as high importance. If you see the
 icon, it means that the conversation is marked with low importance.
Attachment
Indicates if the conversation has attachment(s) within it. It also displays the number of attachments.
Subject
The subject of the conversation.
From
The person who has sent the mail or initiated the conversation.
To/CC/BCC
Indicates the participants of the conversation
Sent Time
The actual when the document was sent.
Network
The network used to communicate.
Channel
The channel used to communicate.
Tags
Name of the Tag Groups that have been assigned.
Held
Indicates the document has been placed on Hold from the Collect workspace.
Selecting, Adding Notes, and Tagging a Conversation
To select, add notes and tag a conversation:
Perform the procedure listed in Searching Held and Collected Conversations.
To select a conversation, click the conversation from the Documents pane. View 2 displays the details of the selected conversation.
Type notes for the selected conversation in the Notes text box.
Select the tags for the conversation, from the tag group below the Notes text box.
Click Save. The notes and tags are added to the selected conversation.
Repeat the above steps to add notes and tags to another conversation.
Important
After conversations are put on hold during review and at a later stage, if any of these conversation(s) are selected for Un-Hold during the collect process, the conversations still remain tagged. Tagged conversations filter in the Refine Search tab from the Search panel displays the count including such conversations, however search results do not display these conversations.
Enterprise Archive allows you to refine search results with respect to participants, networks or communication channels. You can also save search results, for more information see Refining Search Results - Case Management.
Bulk Tagging
You can now tag all documents in Review search at once. To perform bulk tagging:
Perform the procedure listed in Searching Held and Collected Conversations.
Navigate to View 2 and on the left pane.
Select the desired tags.
Enable Tag All Search Results under Bulk Tagging.
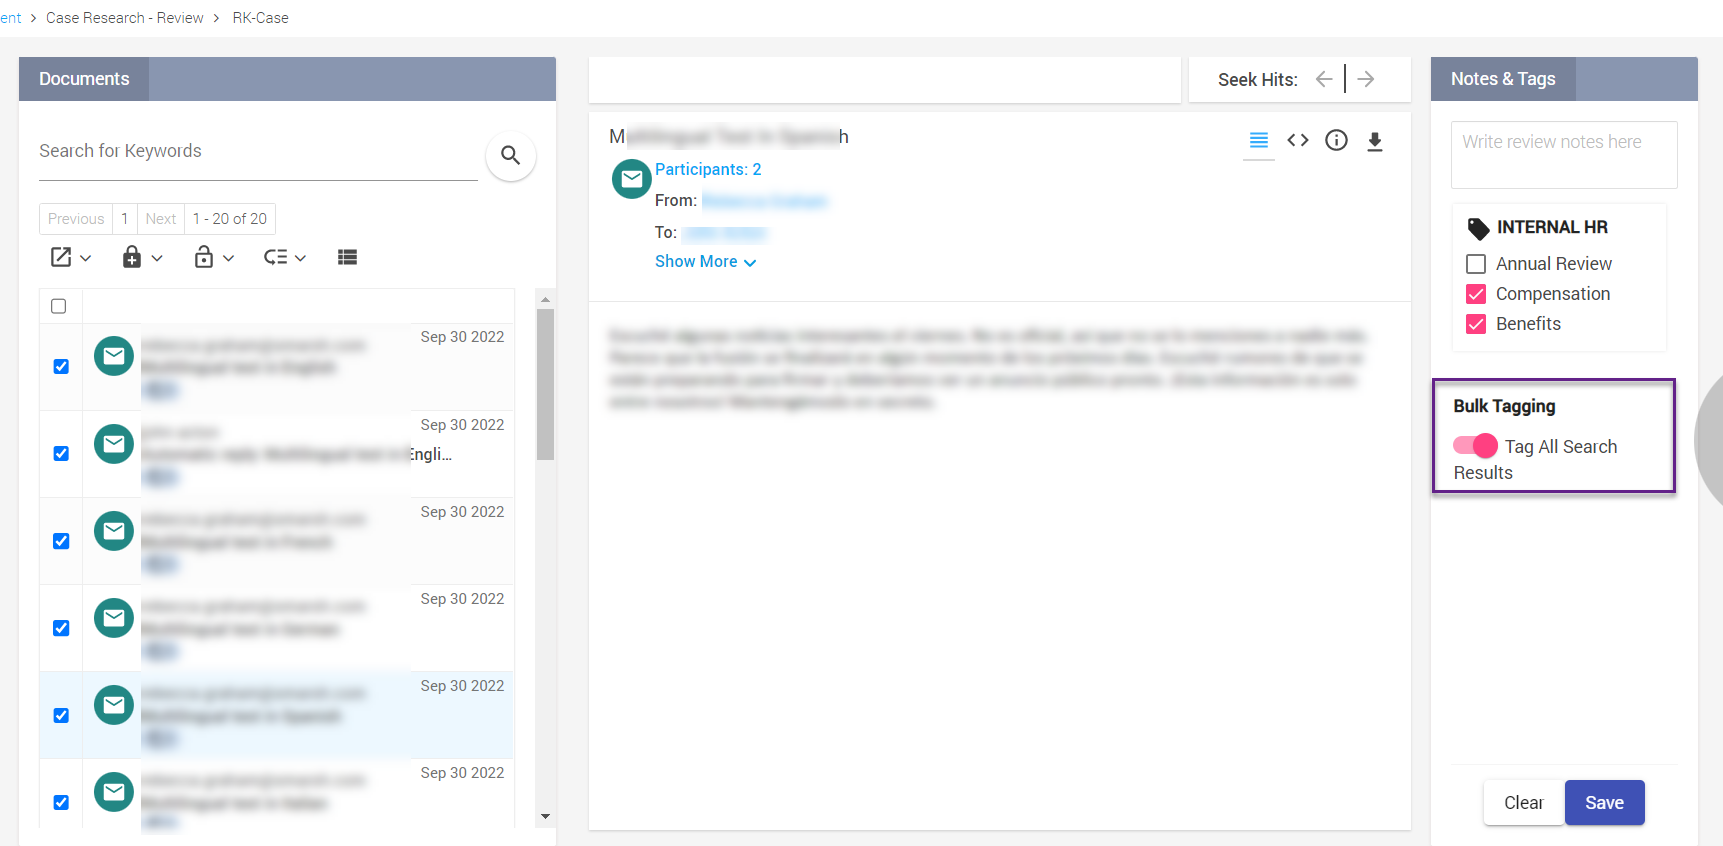
In case you are applying bulk tags to all duplicate content, the UI is slightly different. Enable the Apply To All Content Duplicates under Related Items to apply tags to all duplicate content.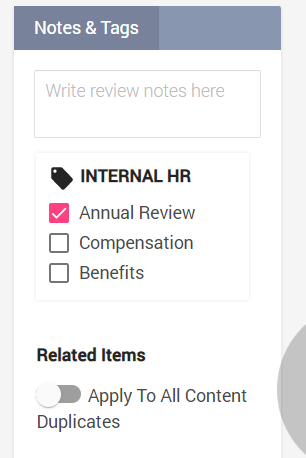
Click Save.
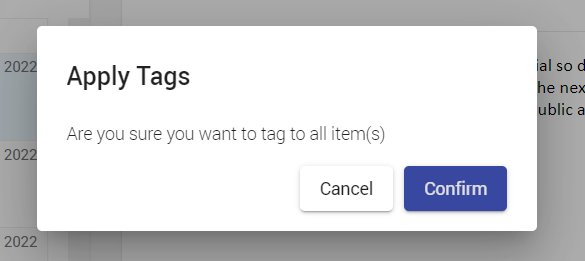
A confirmation dialog appears asking you to confirm the action, click Confirm.
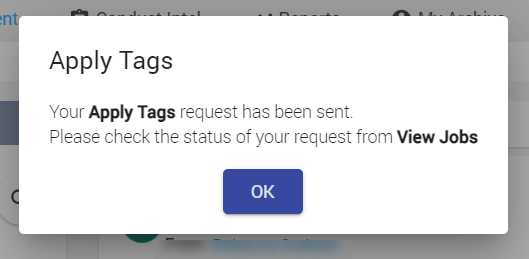
Another dialog appears stating that the Apply Tags request is considered. Navigate to the View Jobs page to view the status.
Uncollecting Documents
Important
Uncollect feature is not available by default. Contact Smarsh Support to enable this feature.
To Uncollect documents in the Review page:
In the Review page, perform a search of documents.
Click Uncollect drop-down (
 ) and click All Items.
The Uncollect operation automatically excludes held documents while providing the count of such documents in the Uncollect pop-up window. If required, such documents may be released from hold before performing an uncollect operation. Choose the following type of documents you wish to uncollect:
Uncollect documents neither on Legal hold nor having Tags/Notes - This option is enabled by default and uncollects documents that are neither on hold nor have any Review Tags or Notes. The count of all such documents are also displayed.
Uncollect documents not on Legal hold but having Tags/Notes - This option is disabled by default to avoid unintentional uncollection of documents that are under review and that are not on hold but are annotated with Review Tags or Notes . The count of all such documents are also displayed. Enable this checkbox to uncollect such documents.
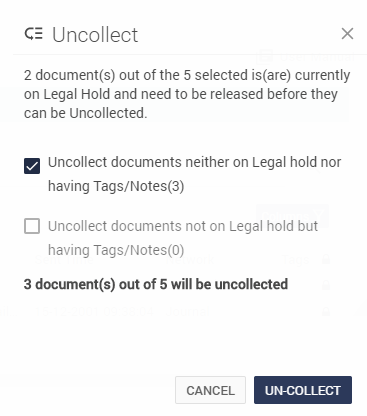
Click UN-COLLECT.
Uncollect submission message appears. Click OK.
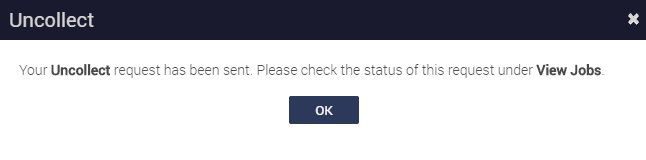
Click View Jobs (
 ) to the see the status of the documents.