Creating an Enterprise Archive User
Enterprise Archive allows you to add users in the following ways:
Creating a New User
To create an Enterprise Archive user:
Select the Administration tab.
Click Users in the workspace for Administration.
Click Add User in the Users pane.
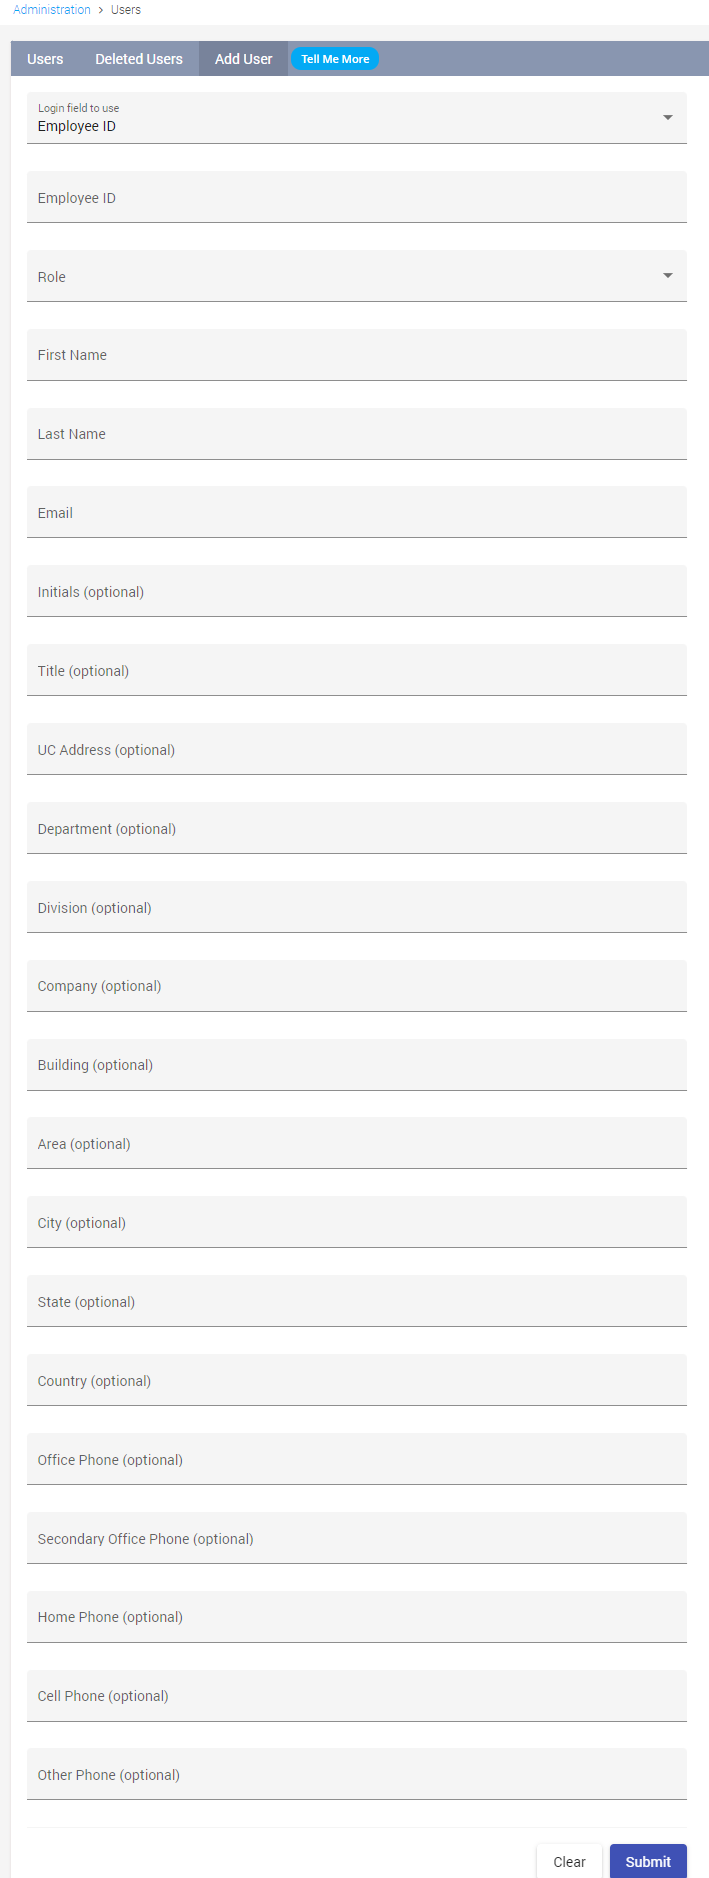
Type the details described in the following table in the Add User window:
Table 3: Add User - FieldsFields
Description
Mandatory Fields
Login field to use
Select the login field as Employee ID or Email
Yes
Employee ID
The employee ID of the user.
No
Role
Select the role for the user.
Important
Enterprise Archive does not allow users to change their Roles from the Edit User window and Permissions from the Edit Role window.
Yes
First Name
The first name of the user.
Yes
Initials
Initials of the user, such as Mr, Mrs, or Miss.
No
Last Name
The last name of the user.
Yes
Title
The job title of the employee.
No
Email
The email ID of the employee.
Yes
UC Address
Enter the UC Address.
No
Department
The department in which the employee works.
No
Division
The division in which the employee works.
No
Company
The company name of the employee.
No
Building
The name of the building where the employee works.
No
Area
The area or the locality name of the employee's office.
No
City
The city where the office is located.
No
State
The state to which the City belongs.
No
Country
The Country to which the State belongs.
No
Office Phone
The office phone number of the employee.
No
Secondary Office Phone
The secondary phone number of the employee, if any.
No
Home Phone
The residential phone number of the employee.
No
Cell Phone
The mobile phone number of the employee.
No
Other Phone
Any alternate phone number where the employee can be contacted.
No
Click Submit to create an employee. The Enterprise Archive application creates a new user and the new user is listed in the Users panel.
The new user receives an email with log on credentials on the Email configured in the Add User page.
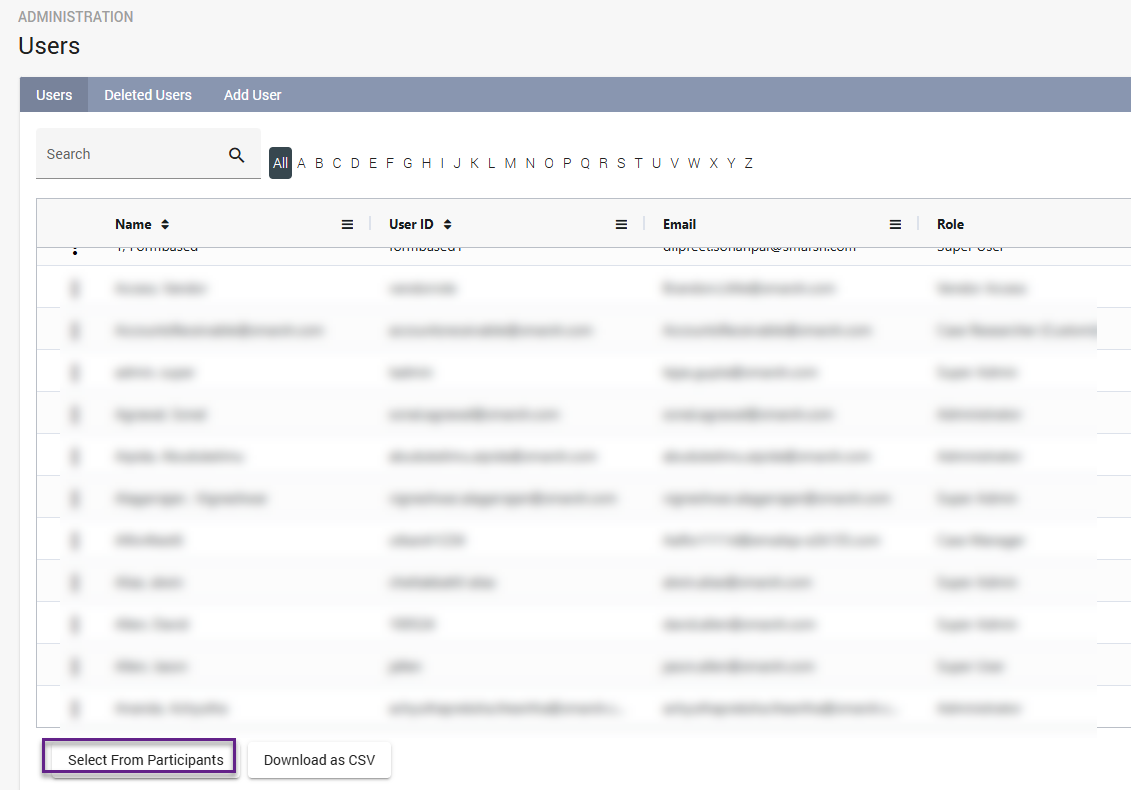
Creating a User from Participants List
Enterprise Archive allows you to add a user from Participants list. To add a user from the Participants list:
From the Users page, click Select from Participants. You can select multiple participants from the list.
Select the participant you wish to add as a user.
Select the role type to be assigned to the participant from the Select Role Type drop-down.
Click Add.
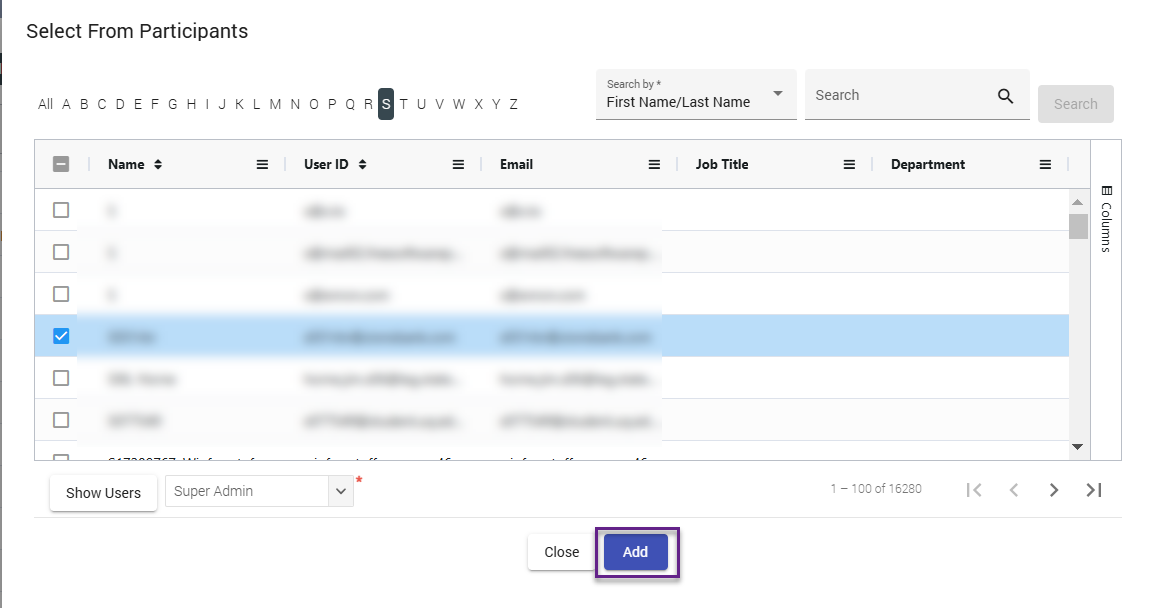
A success message is displayed if the participant is added as a user.