Defining a Retention Policy
To define a retention policy:
Select the Archive Management tab > Retention & Disposition > Add Policy.
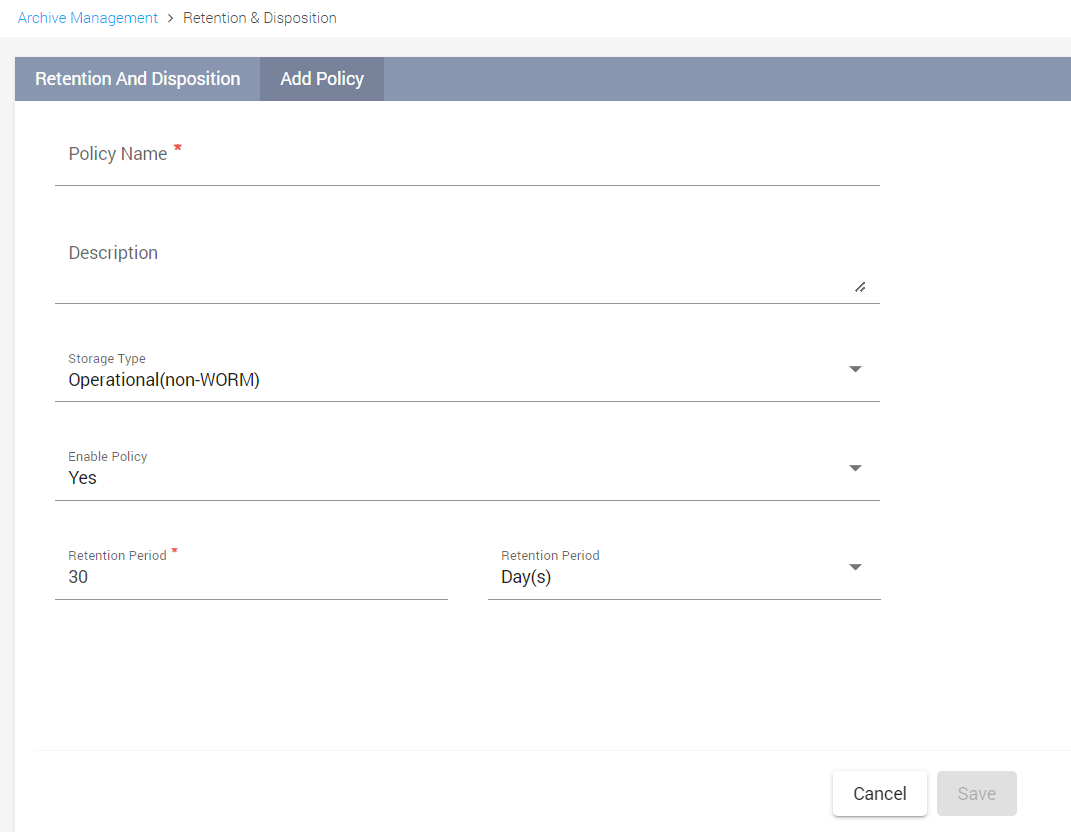
Type the details described in the table below in the fields of the Add Policy dialog:
Field
Description
Mandatory Field
Policy Name
Type a name for the new policy.
Yes
Description
Type a description for the new policy. It is recommended that your description provides information on the policy and its purpose.
No
Storage Type
Select the appropriate storage type from the options listed:
Compliance (Worm)
Operational (Non-WORM)
Yes
Retention Period
Select the appropriate duration till when the policy must remain enabled. Use a combination of the following options:
Select the number of day(s), month(s) or year(s) that you want to assign.
Select any one of the following:
Year(s)
Month(s)
Day(s)
Yes
Enable
Select one of the following:
Yes—To enable the created policy.
No—To create the policy, and retain it
No
Click Save. The retention policy is created and is listed in the Retention & Disposition panel.
Associating a Retention Policy with Targets
Enterprise Archive allows you to apply the retention policy to a target. A target is a set of groups, networks, channels, and countries. When you associate a retention policy to a target it is specifically applicable for the set of groups, channels, networks, and country of the target.
X-header based polices will be applicable only to tier 2 data. For more information on associating targets for tier 2 policies, refer the Adding Custom Attributes as Targets for Tier-2 section.
To associate a retention policy with a target:
Define a retention policy by following the procedure listed in Defining a Retention Policy .
Click the
 button in the Targets column in the Retention & Disposition panel. The Targets panel appears.
Click the drop-down menu and choose a target from the list, such as Participants, Group, Network and so on. A respective list based on your selection appears below.
Add attributes from the selected target by clicking the
 icon. Once added, the icon beside the selected attributes changes to
  . The added attribute is listed on the right of the panel under the respective the Target name.
Similarly, select respective attributes from the desired targets.Click Save.
Important
Note that when multiple Targets are added, an AND logic is applied between the targets and for attributes within each target, an OR logic is applied.
For example, the following image has three targets are added - Participants, Network, and Departments. Between these three targets, an AND logic is applied.
Between each attributes within the target, an OR logic is applied. That is, under Participants, an OR logic is applied between paige, alexis, and Lea. Similarly, an OR logic is applied between all four attributes under the Departments target.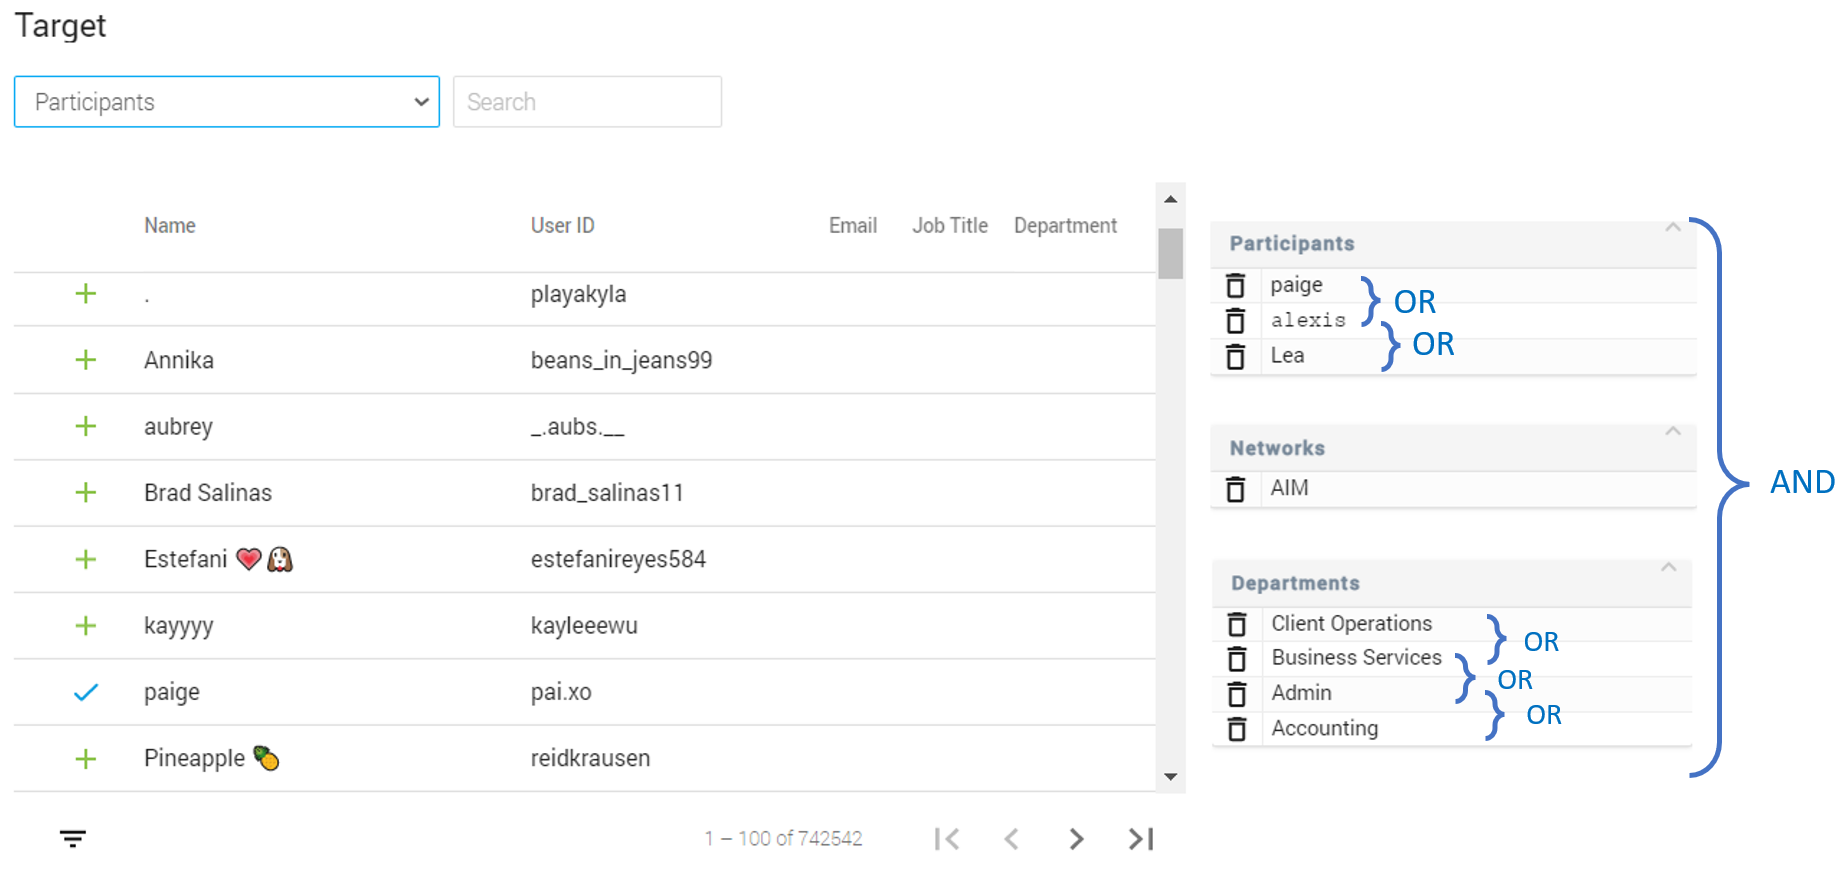
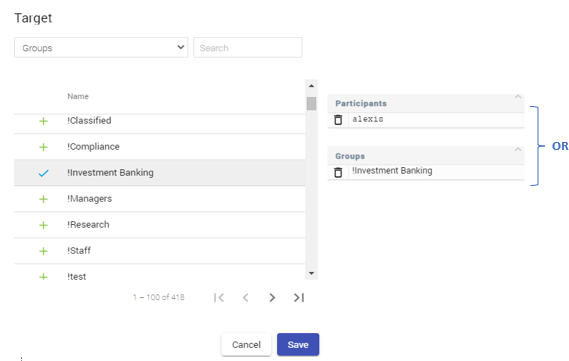
As an exception to this rule, an OR logic is applied when the Group and Participants targets are added. For example, consider that a policy is created with both Participants and Group targets. If alexis is added as Participant and Investment Banking is added as the Group attribute, the retention policy is applied for alexis OR anyone in the Investment Banking group.
Adding Custom Attributes as Targets for Tier 1
To add custom attributes as the target, select the desired attribute that has been added from the drop-down. For the example below, ExchangeServerVersion, PhotoURL, and Employee role in Vantage are custom attributes that have been imported along with a participant's CSV details. ExchangeServerVersion and Employee role in Vantage are the selected custom attribute. Employees that belong to any of the ExchangeServerVersion and Employee role in Vantage labels (Exchange Administrative Group and Employee) will be assigned as targets to the retention policy being setup.
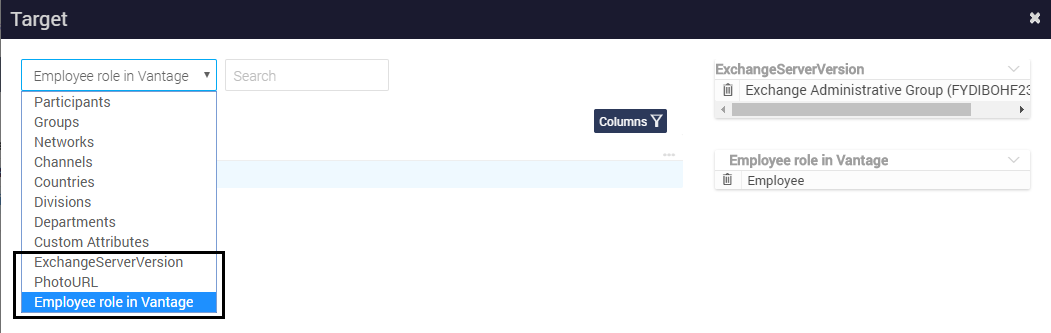
For more information related to custom attributes, refer the Custom Attributes section.
Migration of Retention Values via Tier 1
The Dodd Frank feature, by default is not available in your Enterprise Archive setup.
To associate targets specific to the Dodd Frank retention policy:
Define a retention policy by following the procedure listed in Defining a Retention Policy .
Click the
button in the Targets column in the Retention & Disposition panel. The Targets panel appears.Select Custom Attributes from the drop-down. The following screen appears.
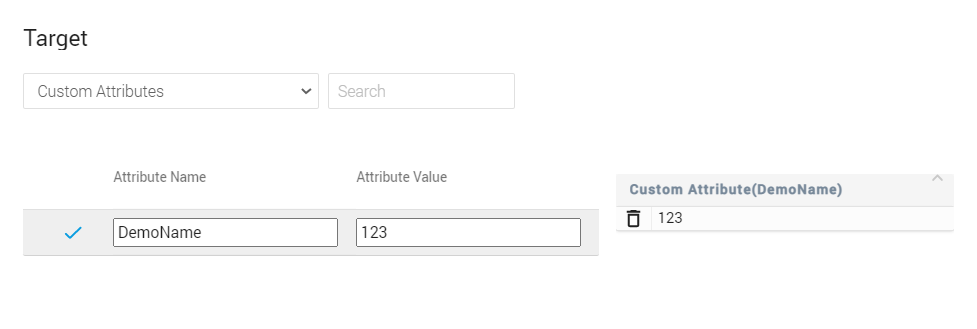
Enter the Attribute Name and Attribute Value that is assigned to the historical content being ingested.
To add the attributes to Targets, click the
icon. The attributes will be listed in the Targets pane.Click Save.
Adding Custom Attributes as Targets for Tier 2
Smarsh's Data Management Services team can provide an optional service to transfer retention policy information from a legacy archive during migration. They will label individual messages using a defined X header, which will provide a key value pair that can be used when defining a custom attribute as a target . For each key-value pair specified within the header, create individual retention policies and associate them to targets separately.
To create retention policy and associate targets:
Define a retention policy by following the procedure listed in Defining a Retention Policy .
Click the
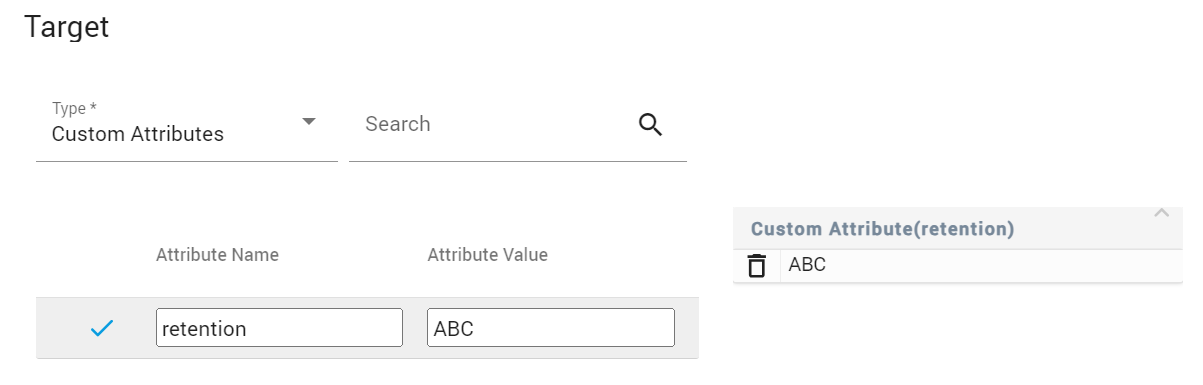
button in the Targets column in the Retention & Disposition panel. The Targets panel appears.Select Custom Attributes from the drop-down. The following screen appears.
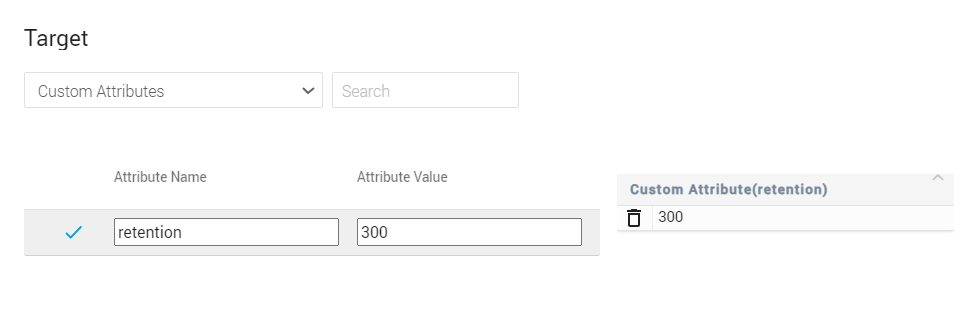
Enter the Attribute Name as retention.
Enter the Attribute Value that is assigned to the historical content being ingested. Please verify that the values entered here correspond with the value in the email header of the EML .
To add the attributes to Targets, click the
icon. The attributes will be listed in the Targets pane.Click Save.
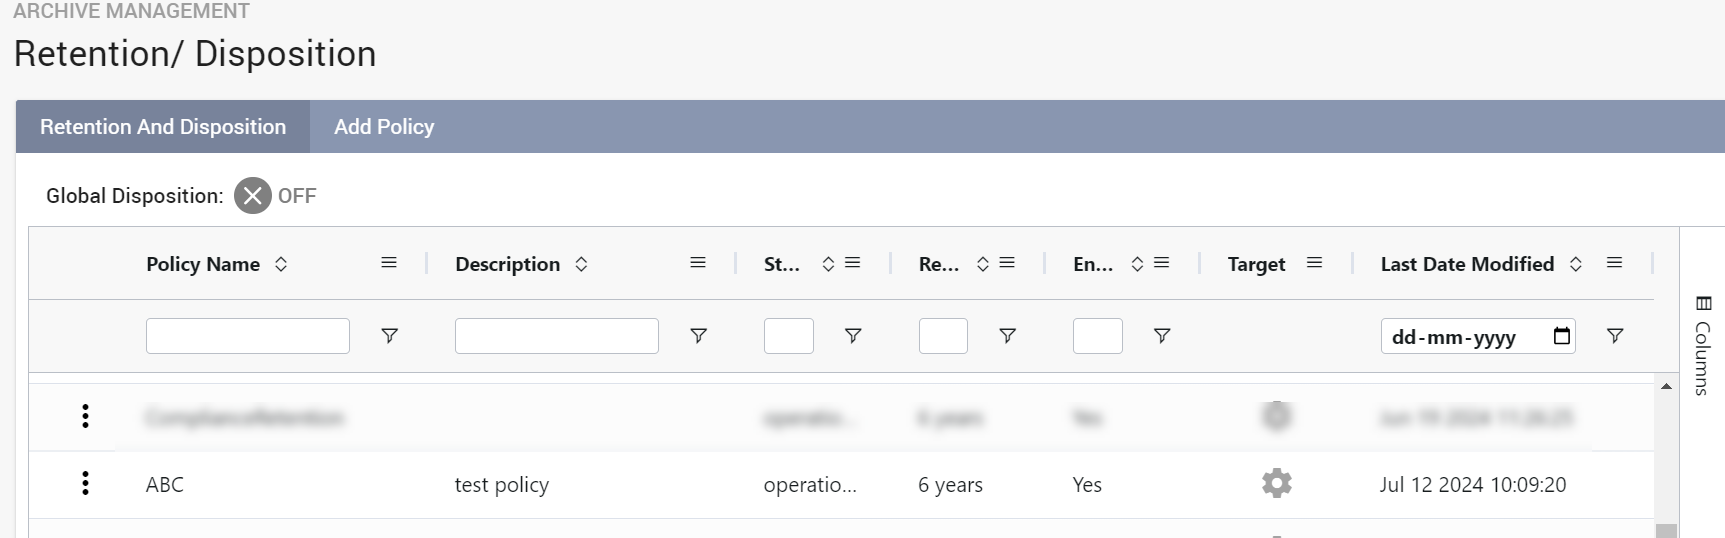
For example, consider that the policy in the legacy archive is using a retention code of 'ABC' with a retention period of 6 years. Smarsh's Data Managment Services team can apply the retention code to the message as a Custom Attribute, and this Custom Attribute can be used as a target.
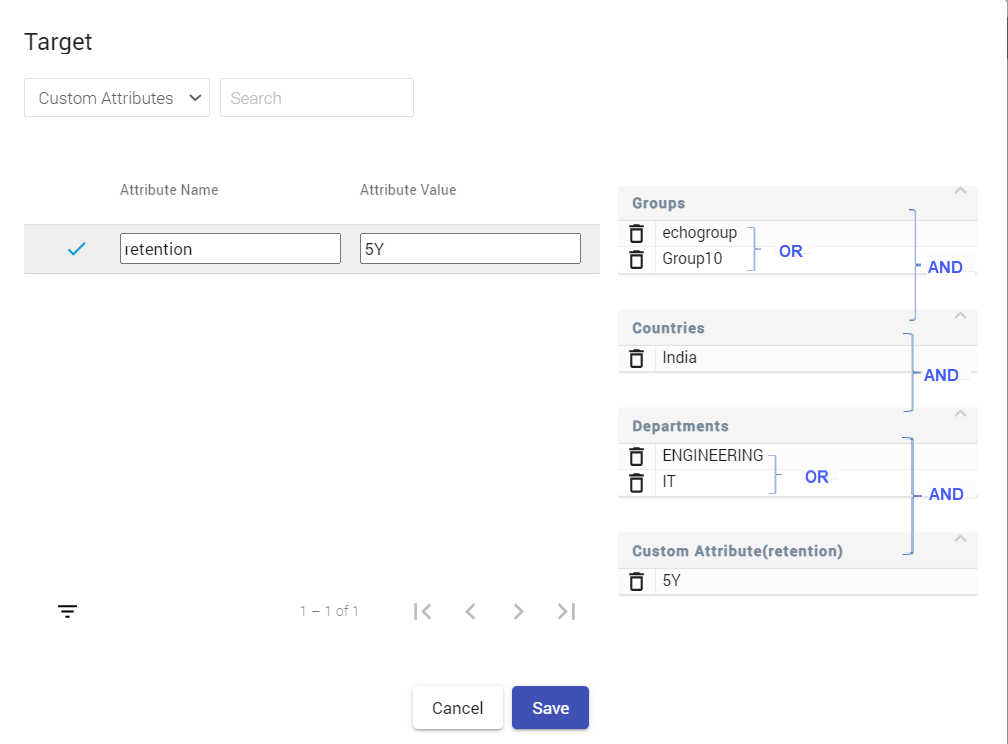
Associating Retention Policy with Multiple Targets
When you add multiple Targets, they are combined using AND logic, and for each attribute within each Target, OR logic is applied.
For example, the following image contains four distinct targets, each designated for different groups. The policy comes into effect if the following conditions are met simultaneously:
The group is either echogroup or Group 10.
The country is India.
The department is either ENGINEERING or IT
Retention is configured as 5Y.