Create a Case
Important
To create a case, the user must perform the following actions:
Create Tags and Tag Groups
Tags help in classifying of documents, reviewer's actions, and identification of documents. A Tag Group can contain multiple tags. You must assign meaningful tags to conversations.
A tag group includes single or multiple tags. You must first create a tag-group and then add tags to it.
To create a tag-group and add tags to the tag groups:
Select the Case Management tab.
Click Tag Groups from the Case Management workspace.
Click Create.
Figure 60: Add Tag Group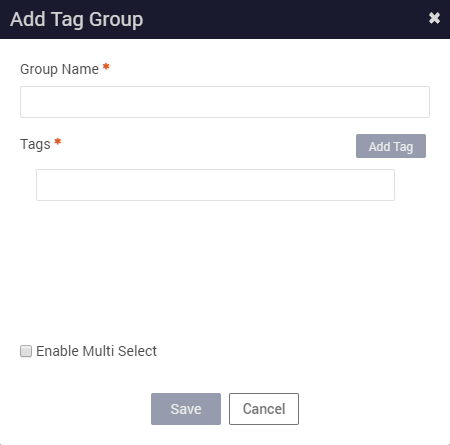
Type a name for the new tag group, in the Group Name text-box.
To create tags and assign them to the tag group, click Add Tag. An empty text box appears.
Type a tag name in the text box.
To enable multiple selection of tags within a Tag Group, select the Enable Multi Select checkbox.
After you have completed adding the required tags, click Save.
Creating Private Tag Groups
Private tags groups, also known as case specific tag groups are visible only within a particular case. Private tags are confidential tags such as sexual harassment, racism, or employee termination and so on. Such tags must not be exposed to other case reviewers and hence private tags are visible only within a particular case.
To add private tag groups:
Select the Case Management tab.
Select a case from the Cases page.
Click the Case Research menu and select Case Specific Tag Groups.
Click + Create Tag Group.
Type a name for the new tag group, in the Group Name text-box.
To create tags and assign them to the tag group, click Add Tag. An empty text box appears.
Type a tag name in the text box.
To enable multiple selection of tags during assignment, select the Enable Multi Select check box.
After you have completed adding the required tags, click Save. These tags are now visible only within the particular case.
Important
Once tag groups have been created, the user must now create a case and add case custodians.
Creating a Case and Adding Case Custodians
Enterprise Archive allows users to create cases or update existing cases based on specific industry scenarios to perform operations such as Collect, and Review on conversations.
Once upgraded to the latest version, Enterprise Archive automatically renames duplicate case names by suffixing them with a time stamp to make them unique.
For example, if there are two cases with names Case_EmpViolations, after an upgrade, the oldest scheduled case is renamed to Case_EmpViolations_<last_updated_timestamp>.
To create a case:
Select the Case Management tab .
Click My Cases from the Case Management workspace.
The My Cases pane provides a list of cases that are created in Enterprise Archive.Click Create Case from the My Cases pane to create a new case.
The information in the Create Case tab is ordered by the following categories:
Category Heading
Category Field/Info
Category Field Description and Task
General Info
Name
Enter a valid case name in this field.
Ensure the case name entered is unique. Enterprise Archive does not allow you to create duplicate case names.
An error messages is displayed if a duplicate case name is attempted.
Description
Enter case specific details in this field.
Notes
Enter additional notes related to the case in this field.
Collected Info
Collected
The icon displays the number of documents have been collected to this case.
Held
The icon displays the number of collected documents with legal holds that have been applied.
Tagged
The icon displays the number of documents that have been tagged.
Created/Modified Info
Created By
The owner or create of the case.
Date Created
The data of case creation.
Last Modified By
The person who last modified the case.
Last Modified
The time stamp when the case was last modified.
Assigned To
Select Assignees
Use this field to add case assignees who will preside over the case, based on the role that will be assigned to them. You can add users and groups to the list of case assignees as shown below:
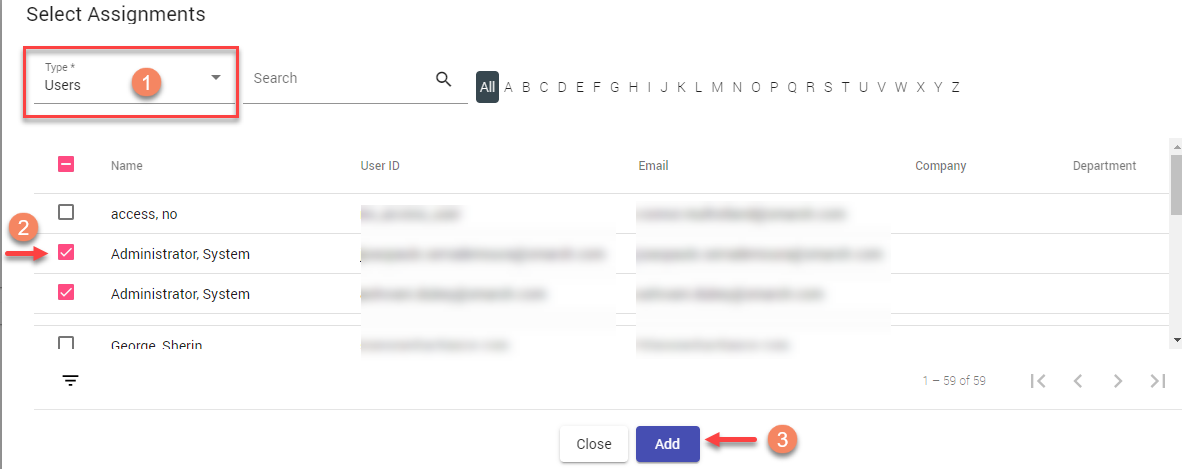
Select from Users/Groups from the drop-down.
Click the checkbox next to the user/group to be assigned to the case.
Click Add to complete the assignement.
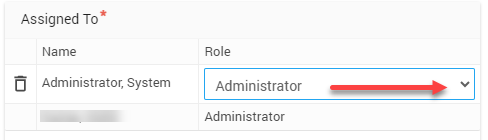
Role
To assign a role to the case assignee, click the drop-down and select from a list of pre-configured case roles such as administrator, case researcher or case reviewer, as shown below:
Users who have been assigned a role as part of Groups assignement will be allowed to modify their Role. However users who have been added using the Users drop-down will not be able to edit the
Tag Groups
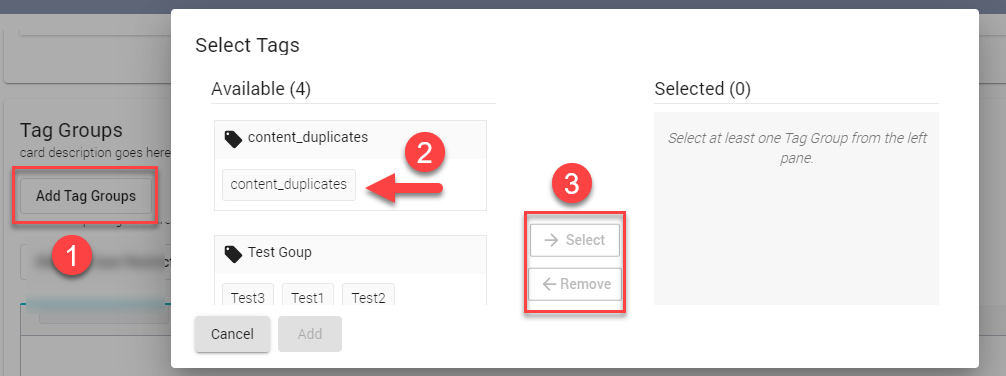
Add Tag Groups
Select this option to tag a case with pre-defined tag groups that have already been created. Tags help in classifying cases based on certain labels.
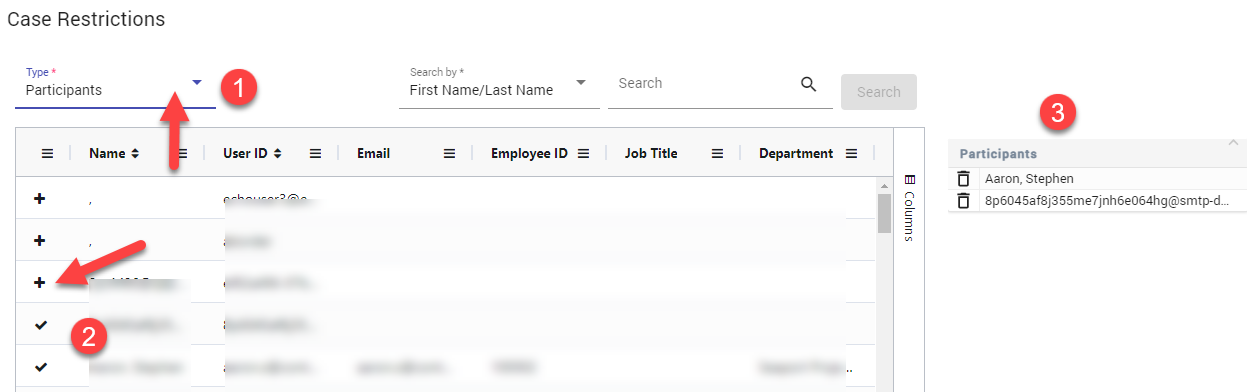
Case Restrictions
Manage Case Restrictions
Use this option to add case-level restrictions to documents that will be collected and reviewed. Setting case restrictions will limit the content that is collected into a case. Case restrictions can be applied based on the following main attributes:
Participants
Groups
Networks
Channels
Countries
Divisions
Departments
For a more detailed understanding on how case restrictions are applied, refer the Understanding Case Restrictions topic.
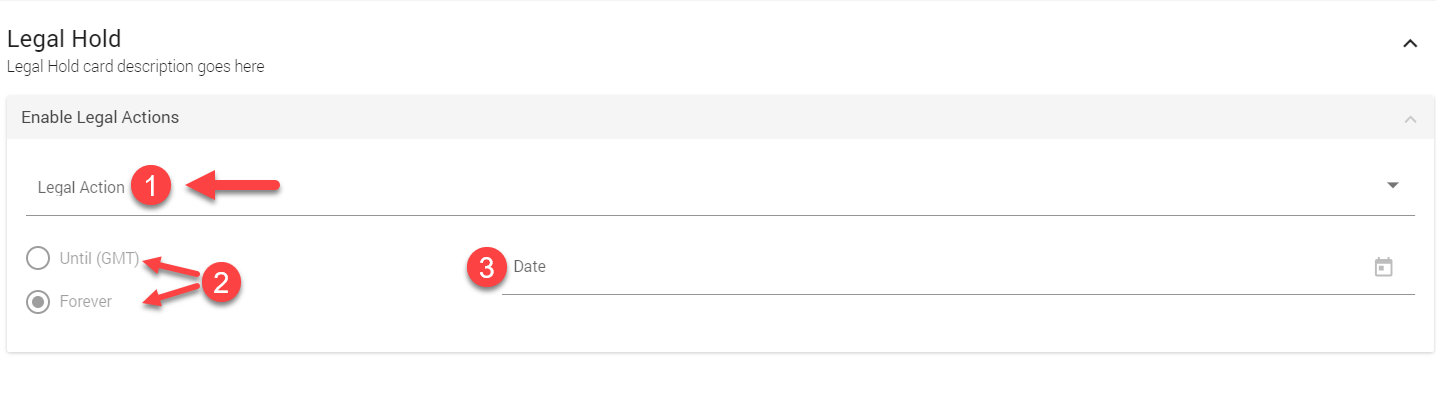
Legal Hold
Enable Legal Actions
This feature (also known as, Day Forward Legal Actions) allows a case manager to automatically collect, or collect and place any new documents belonging to a case custodian on legal hold based on selected time period options. To enable legal action on documents, select the Legal Actions as:
Collect & Apply Holds - Select this option to automatically collect any new documents, and place them on legal hold.
Collect Items - Select this option to automatically collect any new documents.
You can also assign a fixed or infinite time period for the hold by selecting either:
Forever - All new documents sent, received or posted by any case custodian from the time this feature is enabled or turned on.
Until - All new documents sent, received or posted by any case custodian from the time this feature is enabled or turned on, until the time specified.
Important
The Enable Legal Hold task frequency is set to 1 hour by default.
Custodian
Custodians
Use this option to add custodians, or users and groups who will be monitored as part of the case. You can add custodians to a case by either:
Selecting from the list of Participants/Groups that are already available in the system by clicking the
 icon.
icon.Entering a new list of Participants/Groups that could be external or public and are not availabe in the system by clicking the
 icon.
icon.Enter the external or public participant's network display name or their Network Endpoint ID in the Participant(s) pane. Ensure that you add onle participant per line. Similarly, enter external or public group ID in the Group(s) pane.
To create the case, click Save. The My Cases panel appears. The newly created case is listed in the My Case panel.
The My Cases panel displays the following information for each of your cases:
Table 8: Case Details—My Cases panelPermission Category
Description
Name and Description
Provides the name and the description of the case.
Custodians
Shows if there are custodians added to the case.
Assignments
Shows the users that are assigned to the case.
Date Created
Displays the date when the case is created.
You can also use the Search Cases pane on the left to search for cases by Name or Description, Custodians, Assigned To, and Date Created filters.
Creating Case Specific Roles
Enterprise Archive provides users the ability to create case specific roles irrespective of a user's default Enterprise Archive role. To add a role, follow the instructions in the Creating a Role and Granting Permissions section.
To add case specific roles for the cases Case 1, and Case 2.
Perform the steps listed in the Creating a Role and Granting Permissions section to create a new role.
Name the roles Case 1 Role and Case 2 Role respectively.
The default roles are listed in the Select Assignments window.
To modify the user's Role, click the Role field and select the case specific role (Case 1 Role, or Case 2 Role) from the drop-down.
The new role will be applicable only within the scope of the case.This permission controlled feature allows the Administrator to override default restriction policies (based on targets like Legal Entity, LOB and so on) for a case based on a user's default role.
Important
This concludes the first part of eDiscovery actions. The next step involves collecting case content based on the custodians that have been added to a case.