Creating a Case for Case Management 2.0
Enterprise Archive allows users to create cases or update existing cases based on specific industry scenarios to perform operations such as Collect, and Review on conversations.
Once upgraded to the latest version, Enterprise Archive automatically renames duplicate case names by suffixing them with a time stamp to make them unique.
For example, if there are two cases with names Case_EmpViolations, after an upgrade, the oldest scheduled case is renamed to Case_EmpViolations_<last_updated_timestamp>.
To create a case:
Select the Case Management tab .
Click My Cases from the Case Management workspace.
The My Cases pane provides a list of cases that are created in Enterprise Archive.Click Create Case from the My Cases pane.
The information in the Create Case tab is ordered by the following categories:
Category Heading
Category Field/Info
Category Field Description and Task
General Info
Name
Enter a valid case name in this field.
Ensure the case name entered is unique. Enterprise Archive does not allow you to create duplicate case names.
An error messages is displayed if a duplicate case name is attempted.
Description
Enter case specific details in this field.
Notes
Enter additional notes related to the case in this field.
Collected Info
Collected
The icon displays the number of documents have been collected to this case.
Held
The icon displays the number of collected documents with legal holds that have been applied.
Tagged
The icon displays the number of documents that have been tagged.
Created/Modified Info
Created By
The owner or create of the case.
Date Created
The data of case creation.
Last Modified By
The person who last modified the case.
Last Modified
The time stamp when the case was last modified.
Assigned To
Select Assignees
Use this field to add case assignees who will preside over the case, based on the role that will be assigned to them. You can add users and groups to the list of case assignees as shown below:
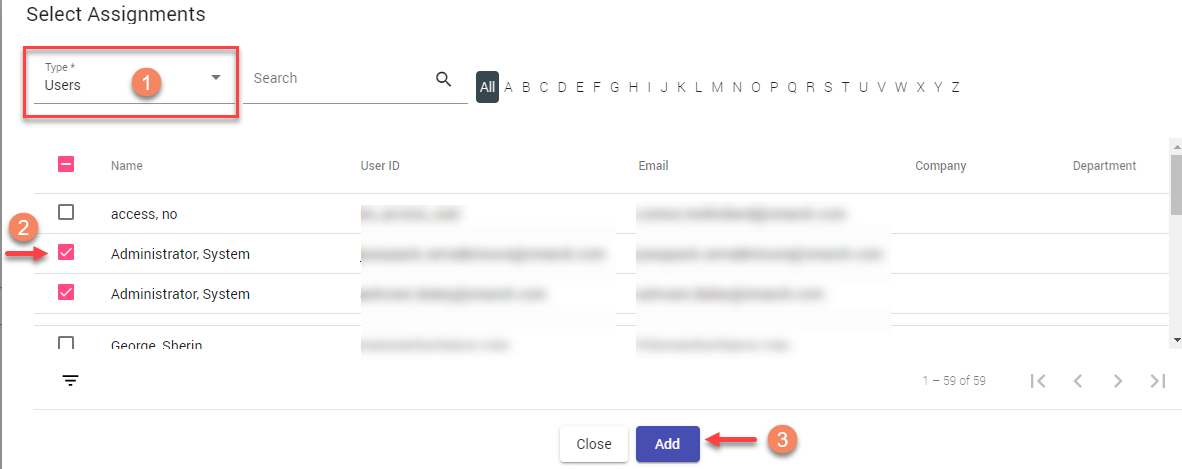
Select from Users/Groups from the drop-down.
Click the checkbox next to the user/group to be assigned to the case.
Click Add to complete the assignement.
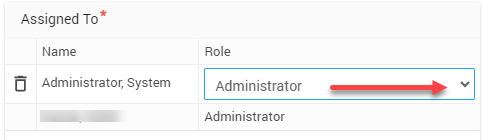
Role
To assign a role to the case assignee, click the drop-down and select from a list of pre-configured case roles such as administrator, case researcher or case reviewer, as shown below:
Tag Groups
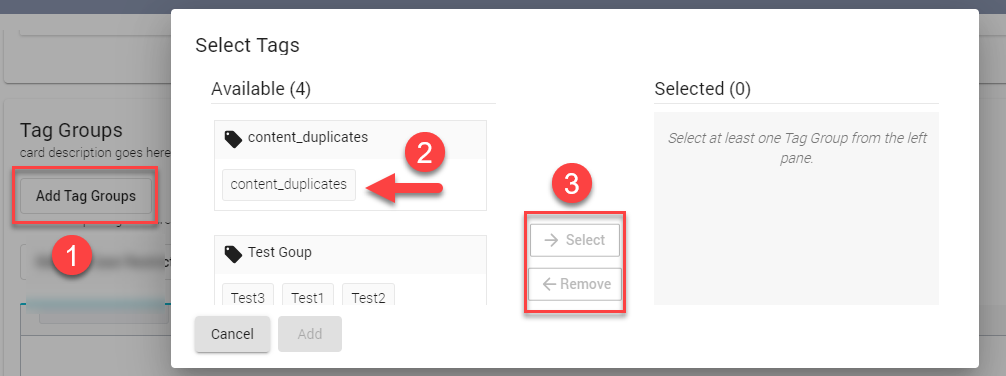
Add Tag Groups
Select this option to tag a case with pre-defined tag groups that have already been created. Tags help in classifying cases based on certain labels.
Case Restrictions
Manage Case Restrictions
Use this option to add case-level restrictions to documents that will be collected and reviewed. Setting case restrictions will limit the content that is collected into a case. Case restrictions can be applied based on the following main attributes:
Participants
Groups
Networks
Channels
Countries
Divisions
Departments
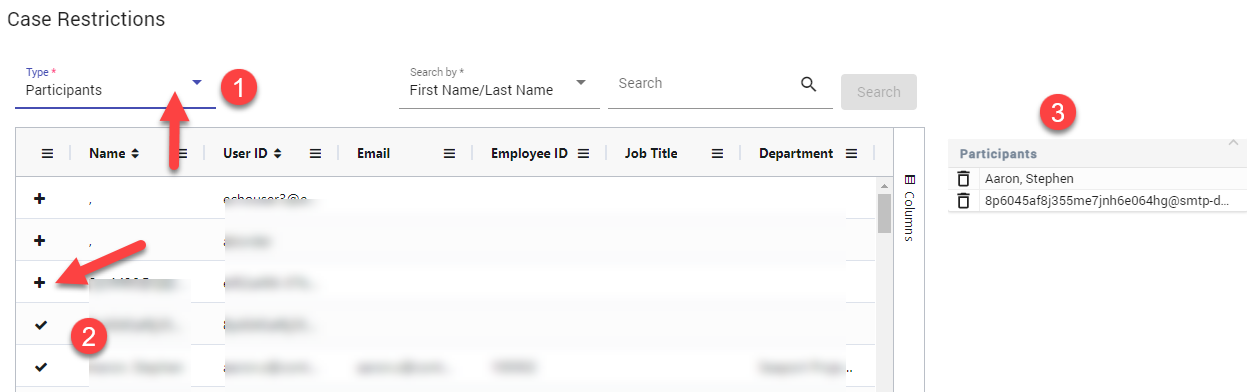
For a more detailed understanding on how case restrictions are applied, refer the Understanding Case Restrictions topic.
Custodian Hold
Enable Custodian Hold
This feature allows a case manager to create and place any new documents belonging to a case custodian on legal hold based on selected time period options. Users have the ability to add, modify, or remove participants or groups for the custodian holds policy, along with an optional date range. See Managing Custodian Holds Policy for more information.
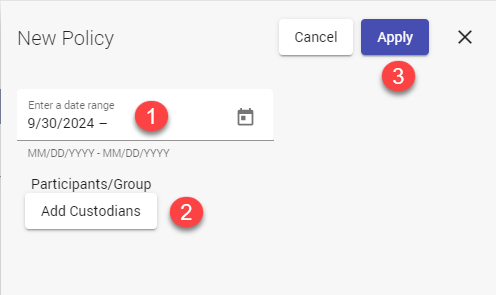
The first step in creating a policy is to select a date range. The date range specifies the starting and ending date set for a policy. You can either set a single date range for all participants, or set custom date ranges for each participant. In order to specify a specific date range choose one of the following options:
Single Date Range: This option allows users to set a single date range that will apply to all participants included in the custodian holds policy. For example, a user could set a single date range of January 1st, 2023 to March 31st, 2023 for all the selected participants or groups.
Specific Dates Per Custodians: This option allows users to set different date ranges for each individual participant included in the custodian holds policy. This can be useful if you need to manage different custodian holds policies for various individuals or groups. For example, a user could set a date range of January 1st, 2023 to March 31st, 2023 for one participant or group, and a different date range of April 1st, 2023 to June 30th, 2023 for another participant or group. This option provides more flexibility and customization options for users who need to manage different custodian holds policies for various individuals or group.
The next step in creating a policy is to add custodians, or users and groups who will be monitored as part of the case. You can add custodians to a case by clicking the Add Custodians button. See Managing Custodian Holds Policy for more information on custodian holds policy.
To create the case, click Save. The My Cases panel appears. The newly created case is listed in the My Case panel.
The My Cases panel displays the following information for each of your cases:
Table 4: Case Details—My Cases panelPermission Category
Description
Name and Description
Provides the name and the description of the case.
Custodians
Shows if there are custodians added to the case.
Assignments
Shows the users that are assigned to the case.
Date Created
Displays the date when the case is created.
You can also use the Search Cases pane on the left to search for cases by Name or Description, Custodians, Assigned To, and Date Created filters.
Creating Case Specific Roles
Case Management provides users the ability to create case specific roles irrespective of a user's default role. To add a role, follow the instructions in the Creating a Role and Granting Permissions section.
To add case specific roles for the cases Case 1, and Case 2.
Perform the steps listed in the Creating a Role and Granting Permissions section to create a new role.
Name the roles Case 1 Role and Case 2 Role respectively.
The default roles are listed in the Select Assignments window.
To modify the user's Role, click the Role field and select the case specific role (Case 1 Role, or Case 2 Role) from the drop-down.
The new role will be applicable only within the scope of the case.This permission controlled feature allows the Administrator to override default restriction policies (based on targets like Legal Entity, LOB and so on) for a case based on a user's default role.