Enterprise Archive Setup for Socialite
To configure Socialite as the Content Sources in Enterprise Archive:
Select the Archive Management tab.
Click Content Sources from the Archive Management workspace.
Click Add besides the Content Sources pane (Content Sources [Add]).
Enter the required values for the Cluster Configuration fields:
Fields
Description
Cluster Name
Select a Cluster Name from the drop-down list, or type a new cluster name.
Secret Key
The authentication password for the point product to ingest data in Enterprise Archive. The secret key is automatically generated by the application.
Cluster Description
When adding a new cluster (Cluster Name), provide a description for future reference.
Figure 27: Addd Content Source - Socialite
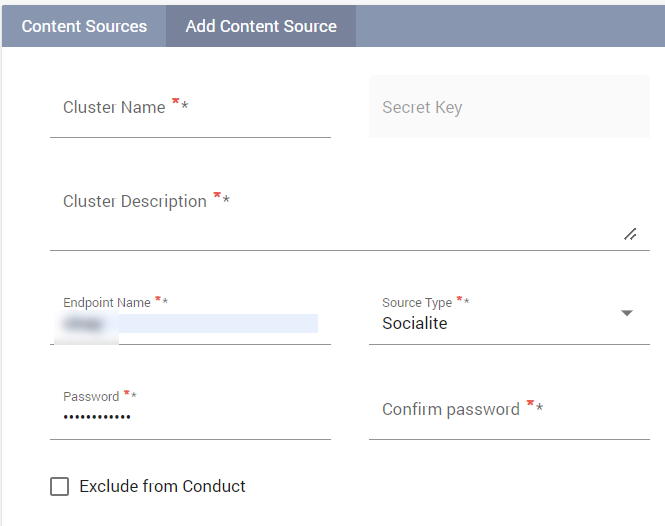
Select the Source Type as Socialite from the drop-down list.
If Source Type is Socialite, enter the required values described in the following table:
Field
Description
Mandatory Field?
Endpoint Name
The authentication name for Socialite to ingest data in Enterprise Archive.
Yes
Internal Domain Names
Type all the domains, in separate lines. These domains are identified as INTERNAL by Enterprise Archive.
Enclose the domain names in quotations for the exact match.
Example
“EnterpriseArchive.com”
smarsh.com
outlook.smarsh.com
no-reply-confleunce@smarsh.com
salesforce.smarsh.com
Important
This field is disabled by default. Contact Smarsh Support to enable this field.
No
Password
The authentication password for Socialite to ingest data in Enterprise Archive.
Yes
Confirm Password
The authentication password for Socialite to ingest data in Enterprise Archive. (Re-enter the password)
Yes
Click Save.
Advanced Options
Exclude from Conduct (Supervisory Reviews):
You can select this option to ensure historical content ingested into Enterprise Archive that has already been reviewed, can be excluded from being supervised by the Conduct Intel application.
Enabling this checkbox will ensure this content is not part of any of the Conduct Intel review queues and Conduct Intel Admin search interfaces.
This content can however be searched for from the Archive Management, and Case Management search interface.
This content can be searched for from the Conduct Intel Archive search interface, if the user has the Full Archive Access permission enabled.
Important
Exclude from Conduct currently works at the Content Source level. Excluding one Endpoint ID from Conduct will exclude all other Endpoints within the Content source as per the current system behavior. Exercise caution when enabling this configuration.
Chain of Custody
You can select the Enforce Chain Of Custody checkbox to ensure data integrity that can be implemented at the cluster level.
Enabling this checkbox will enforce a CoC check on all communication that is ingested from the content source. Communications that do not contain CoC hashes or fail the CoC check will be rejected.
Enabling/disabling the checkbox will prompt the user with a on-screen message requesting confirmation of the the user action.
The enabling CoC action will be captured in the User Activity log.
This field is disabled by default. Contact Smarsh Support to enable this field.
A feature flag is available to include a new Search Tier dropdown field, in both the Add Content Source and Edit Content Source menu options. This dropdown allows you to choose from the following options:
Promotion: Select this option to include Tier 2 promotional content in the search results.
Tier 1: Select this option to search exclusively within the Tier 1 data.
Contact Smarsh support to enable this feature.