Socialite Setup
Exporting Socialite Data into Enterprise Archive
Socialite exports the interaction data in XML format to Enterprise Archive over HTTPS. Data transferred from Socialite must conform to the specifications defined for packaging and transferring data. All data transfers from Socialite are authorized, secure, and encrypted.
The authentication mechanisms and encryption levels are used when the interaction data is exported from Socialite to Enterprise Archive.
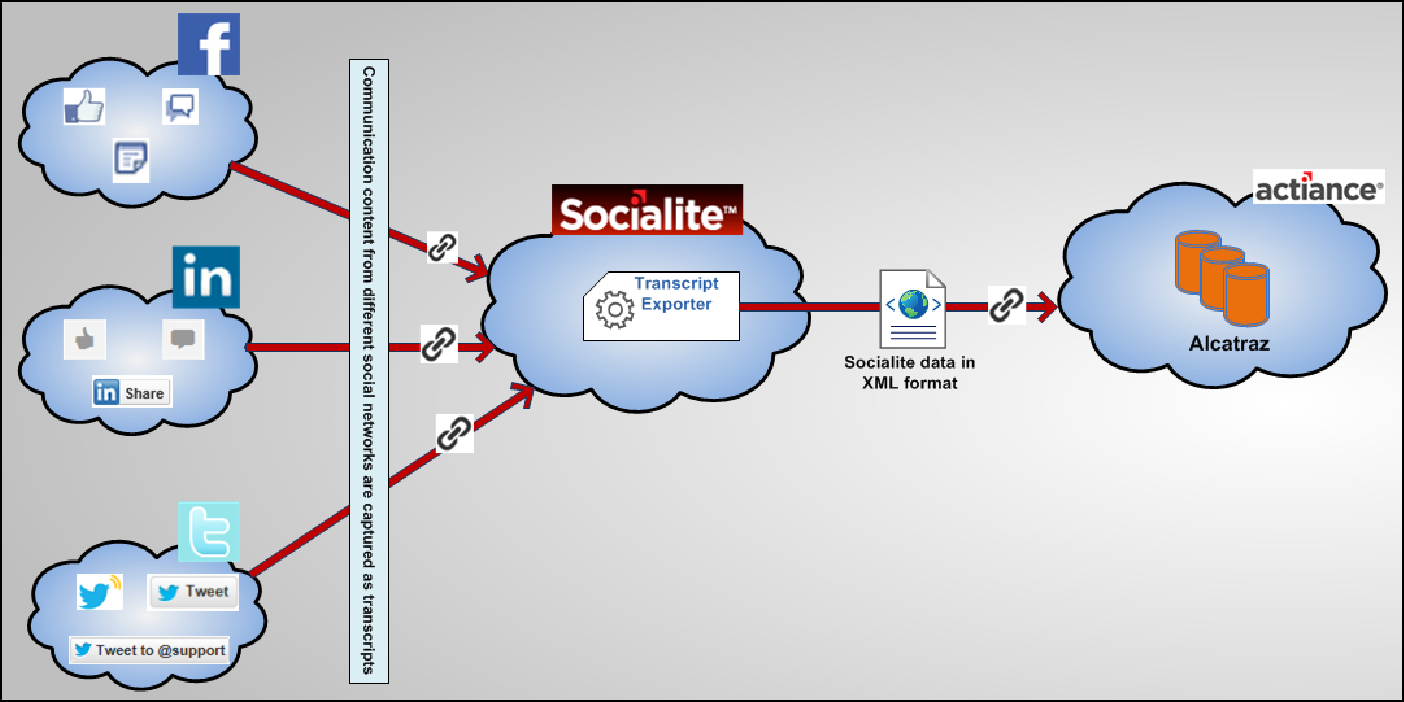
The following table describes the tasks involved to export the Socialite transcripts to Enterprise Archive:
| Task | Description |
|---|---|
| Archive content from social networks. | This task involves archiving content from difefrent social networks such as Facebook, LinkedIn, Twitetr, and Instagram for review and storage. |
| Configure Socialite transcript exporter. | This task involves configuring the Socialite transcript exporter using the administration console of Socialite. |
| Export Socialite transcripts to Enterprise Archive. | This task involves exporting the Socialite transcripts using the administration console of Socialite. |
| Task | Description |
|---|---|
| Data ingestion to Enterprise Archive. | This task involves archiving the Socialite transcripts in Enterprise Archive. |
Configuring the Transcript Export Settings
To configure the export settings for transcripts:
- Log on to the Socialite administrative User Interface with your Remote Administrator credentials.
- Click the Configuration tab.
- Click the Transcript Export Settings link on the Social Networking Compliance Policies panel.
- Navigate to the Setup section and select the check boxes corresponding to Exporter Status and Logging.

Note
Socialite does not support testing of the Enterprise Archive exporter. You can directly enable the exporter by selecting the Enabled check box as shown.
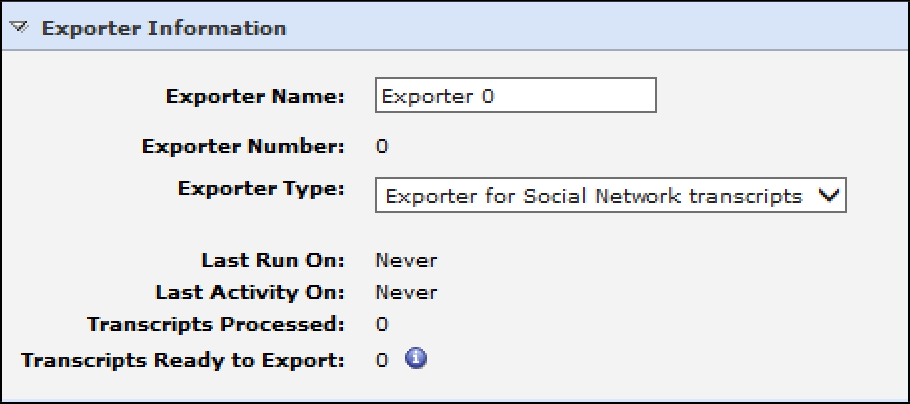
- Navigate to the Exporter Information section and select the Exporter for Social Network transcripts option in the Exporter Type: drop-down list.
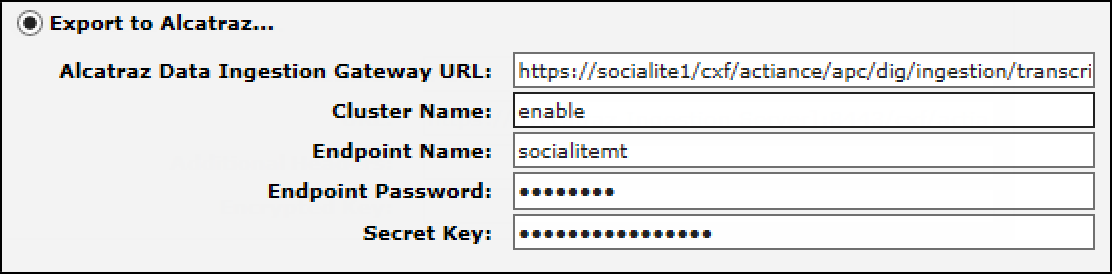
- Perform the following steps in the Export Type section:
- a. Click the Export to Connected Archive... option.
- b. Type the URL address of the Enterprise Archive server in the Connected Archive Data Ingestion Gateway
URL: box. The syntax of the URL is: https://[ Enterprise Archive Ingestion
Server]/cxf/smarsh/apc/dig/ingestion/transcript
- c. Type the cluster name that was mentioned while adding the content source through the Enterprise Archive UI, in
- the Cluster Name: box.
- d. Type the endpoint name that was configured while adding the content source through the Enterprise Archive UI,
- in the Endpoint Name: box.
- e. Type the password of the endpoint that was configured while adding the content source through the Enterprise
- Archive UI, in the Endpoint Password: box.
- f. Type the encryption key that was generated while adding the content source through the Enterprise Archive UI, in
- the Secret Key: box.
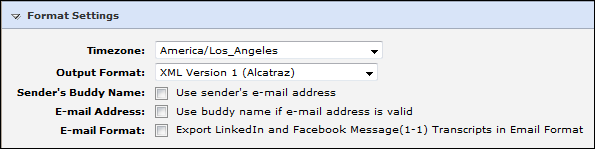
- Perform the following steps in the Format Settings section:
- Select the appropriate time zone in the Timezone: drop-down list.
- By default, the XML Version 1 (Enterprise Archive) option appears in the Output Format: drop-down list when you click the Export to Connected Archive... option in the Export Type: section. Ensure not to change the XML Version 1 (Enterprise Archive) option in the Output Format: drop-down list.
Note
You can configure one or more Enterprise Archive Data Ingestion Gateway URL with different set of content sources.
Configuration of Transcript Export Settings is not related to the following options:
Sender's Buddy Name:
E-mail Address:
E-mail Format:
Therefore, you do not have to select these options under Format Settings.
- Configuring the Format Settings
- Click Apply to configure the export settings of the Socialite transcripts.