Setting Up Domino Journaling
To configure Journaling for Domino Server:
Open Lotus Notes Administrator.
Select the Configuration tab.
Expand the Server node and select the Configurations. The Configurations pane appears .
Figure 18: Lotus Notes Administrator- Configurations pane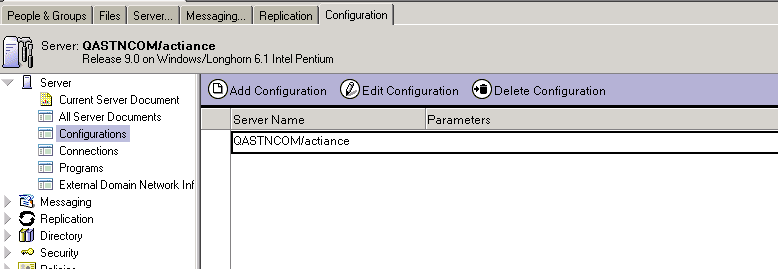
Click Edit Configuration .
Select the Router/SMTP tab, and then select the Basics tab, in the new or existing Configuration Settings window that displays.
Figure 19: Configuration Settings - Basics tab

Set the Address lookup field to “Fullname then Local Part”.
In the Configuration Settings panel, select the Router/SMTP tab.
Select the Advanced tab, and then select the Journaling tab .
Figure 20: Configuration Settings - Journaling tab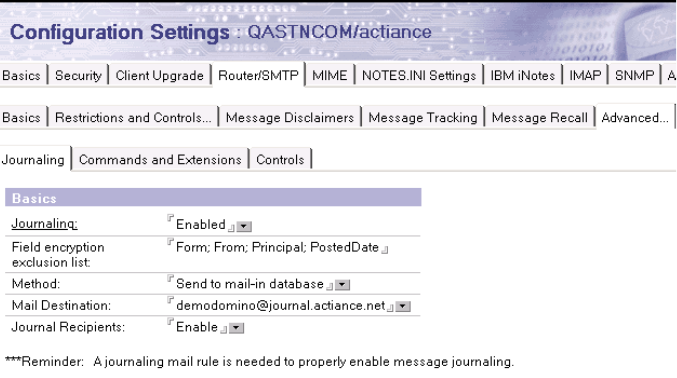
Enter the following information in the Basics section of the Journaling page.
Parameter
Action
Journaling
Select Enabled
Field encryption exclusion list
Enter Form; From; Principal; PostedDate
Method
Select Send to mail-in database
Mail Destination
Enter the SMTP Address that is auto generated while adding a Content Source for Email Journal in Enterprise Archive.
Journal Recipients
Select Enable
Select the MIME tab, and then select the Conversion Options tab.
Select the Outbound tab .
Figure 21: Configuration Settings - Outbound tab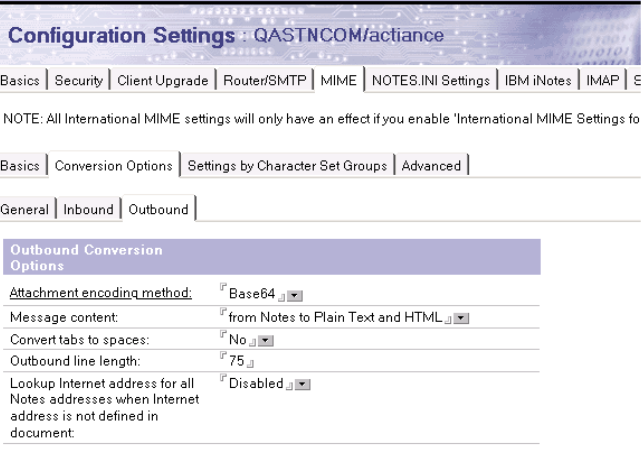
Set the Message Content field to “from Notes to Plain text and HTML”.
Click the MIME tab.
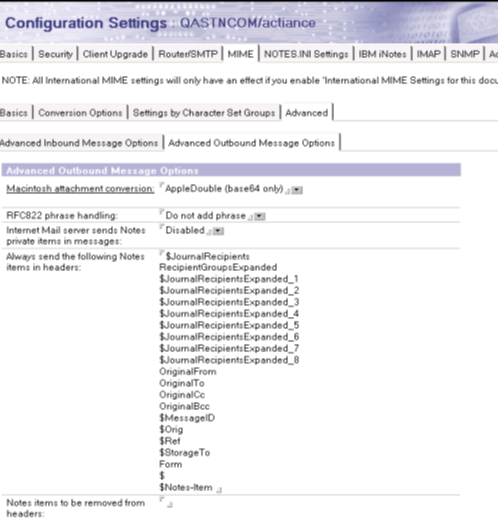
Select the Advanced tab, and then select the Advanced Outbound Message Options tab.
Set the Internet Mail server sends Notes private items in messages field to "Disabled".
In the Always send the following Notes items in headers field select the journal recipients .
Figure 22: Configuration Settings - Advanced Outbound Message Options tab
Creating a New Rule
To create a new rule:
Select the Router/SMTP under the Configuration Settings panel.
Select the Restrictions and Controls tab.
Select the Rules tab .
Figure 23: Configuration Settings - Rules tab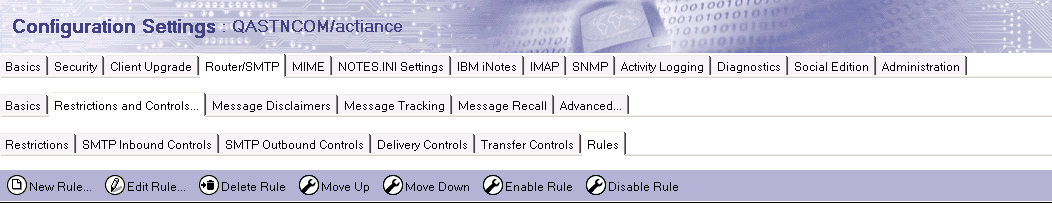
Click New Rule to create a new Journaling rule. The New Rule window appears.
To create the condition to journal all email messages:
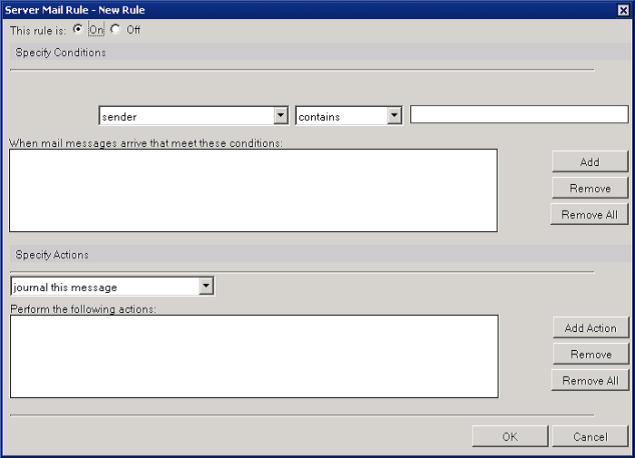
Select On in the This rule is field.
Select All documents in the first drop-down list and click Add .
Figure 24: Server mail Rule - New Rule tab
To create an exception to the condition so that messages sent to your Mail Archive email address are not journaled again:
Select Exception in the Create field.
Select To from the first drop-down list.
Select is from the second drop-down list.
Enter your Mail Archive email address in the Value to check field and click Add .
Figure 25: Server Mail Rule - Specify Conditions
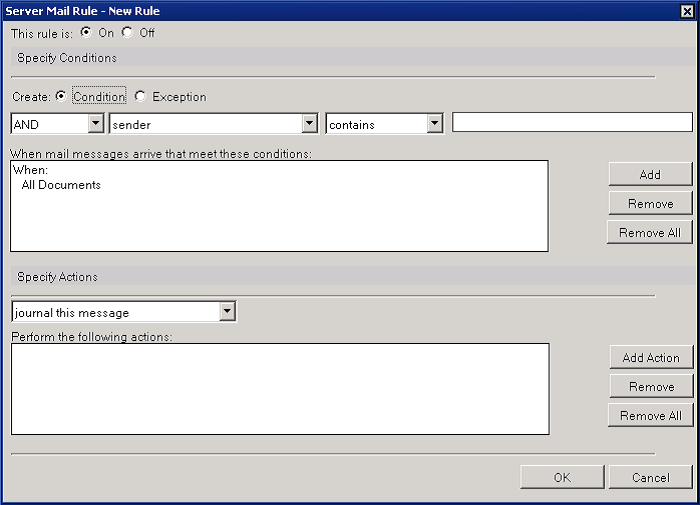
Select “journal this message” in the drop-down list under the Specify Actions section.
Click Add Action.
Click OK to save the rule.
Click Save & Close to save the Configuration Settings document.
Set the following parameter in the .ini file to keep BCCs intact:
RouterKeepRelayedBCCsIntact=1Restart the router by entering the “restart task router” command in the server console and click Send.
OR
Wait for 5-10 minutes for the changes to take affect automatically.
Setting the Global Domain Document
GDD (Global Domain Document) conversion settings are used to construct SMTP internet addresses for users who do not have internet addresses (primary email address). To ensure that Enterprise Archive properly constructs the internet address, the following fields must be defined:
Local Primary Internet Domain: Local Primary Internet Domain name
Domain domain(s) included: NONE
Domain domain(s) position: Left of ‘@’
For additional information on GDD see "http://www-10.lotus.com/ldd/dominowiki.nsf/dx/understanding-the-global-domain-document-".
To set the Global Domain Document conversion settings:
Select the Configuration tab.
Expand Messaging in the left panel.
Select Domains on left.
Expand Global Domain on the right pane.
Select Default Domain Name.
Click Edit Domain.
Select the Conversion tab.