Creating Queues
Queues are created to analyze certain conversations or the nature of such conversations. Queues are formed by assigning supervised participants, adding review levels, assigning tag groups, adding reviewers, selecting a time zone, selecting policies or assigning quota settings.
Important
You can view only those queues that you created in the My Review Queues page.
To ensure content is available for Conduct and Supervision services, ensure the Exclude Conduct checkbox is not checked, while creating the content source.
The following topics detail how to configure Queues:
Adding a Queue
To add a queue:
Click the Conduct tab in the Enterprise Conduct UI.
Click Queues under Configure from the Conduct workspace.
Click Add Queue next to Queues.
Type a name for your queue in the Name box. Ensure to keep a unique name. This helps you to identify this queue from the other queues.
Type a description for this queue in the Description box.
Configure Review levels and add reviewers. For procedural information, see Configuring Review Levels and Adding Reviewers.
Configure Administrators to the queue. For procedural information, see Configure Administrators to the Queue.
Add supervised participants. For procedural information, see Adding Supervised Participant/Groups.
Add policies to queues. For procedural information, see Adding Policies to Queues.
Select your preferred time zone from the Time Zone drop-down.
Click Save. The queue is listed in the Queues page.
Queue Configurations
The following topics detail configurations that can be performed on Queue:
Configuring Review Levels and Adding Reviewers
To configure review levels:
Click Add next to Reviewer Levels. The Add Review Level dialog box is displayed.
Figure 3: Add Review Level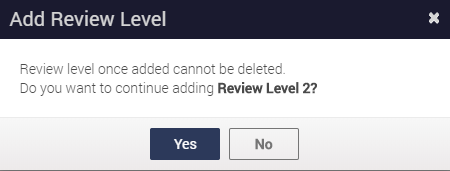
Click Yes. A new review level is added under the Configure Review Levels section.
You can add reviewers to the new review level added.
Adding Reviewers to Review Levels
To add reviewers:
Click Add Reviewer(s) to add one or more reviewers at a review level.
To add one or more reviewer(s), select the checkbox for the reviewer(s), and then click Add. A message appears in the bottom left corner of the Add Reviewers dialog box, confirming the number of reviewers added successfully or the number of reviewers that failed from getting added to the review level.
Select a role for the reviewer, from the Role drop-down list. The drop-down list is activated when you click on the default role.
Click Close to exit the Add Reviewers dialog. The selected reviewers are listed under their respective review level.
Queue administrators can also queue-specific roles to reviewers. To know more on assigning queue-specific roles, refer the Configuring Queue Specific Roles section.
One-Click Close Option
Tags associated with a tag group are available to tag conversations, when tag groups are associated with the Update, Close or Escalate actions. Conduct allows users to automatically update tag groups while marking a conversation as closed. This time-saving feature only for the Close action can be set up as shown below:
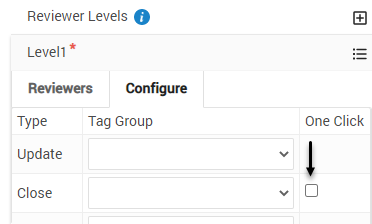
Select Tag Groups for the following type, by clicking the Configure tab next to the Reviewers tab:
Update—Click the drop-down next to Update, under the Tag Group column, and select the tag group from the drop-down.
Close—Click the drop-down next to Close, under the Tag Group column, and select the tag group from the drop-down.
Escalate—Click the drop-down next to Escalate, under the Tag Group column, and select the tag group from the drop-down.
To add more reviewers, repeat Step 1 through Step 5 listed above.
Configure Administrators to the Queue
A queue Administrator will have access to all the documents in a Queue. Conduct user can designate a specific Queue Administrator to perform housekeeping functions such as releasing and reassigning items to other reviewers.
To add a queue Administrator:
Follow the steps 1 through 6 listed under Adding a Queue.
Click the
 icon next to Administrators. The Select Administrators dialog appears.
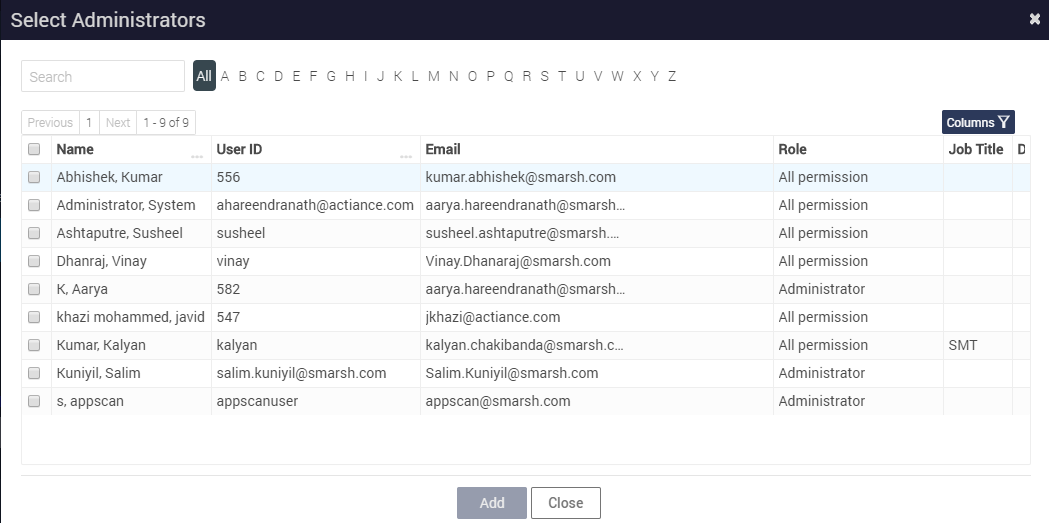
Select the checkbox against the user and click Add.
Click Close to exit the Add Queue Admins dialog.
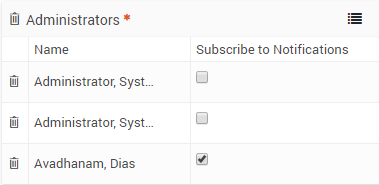
To enable queue notifications to be sent to administrators, select the desired checkbox from the Subscribe to notifications column as shown in the following image.
Adding Supervised Participant/Groups
A supervised participant/group is a participant/group who is involved in a supervised conversation. A participant/group that is added should be from your organization. You can add a maximum of 1000 participants to a queue.
To add a supervised participant(s)/group(s) to a queue:
Follow the steps 1 through 6 listed under Adding a Queue .
Click the
 icon next to Supervised Participants/Groups.
Select the checkbox against the participant(s), and click Add. A confirmation message appears in the bottom-left corner of the dialog.
To add groups, click the drop-down under Participants as shown below:
Figure 4: Participant Drop-Down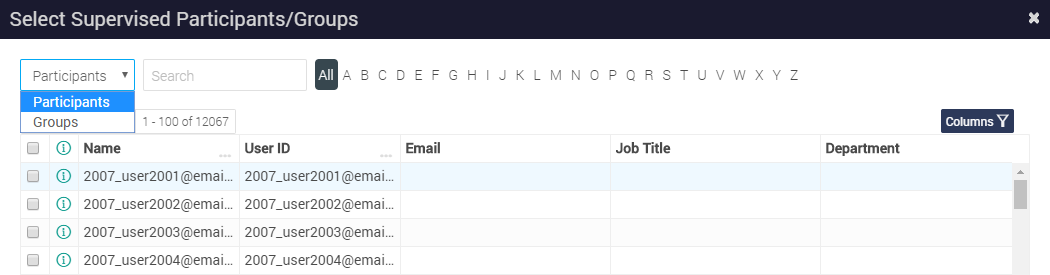
Select the groups you want to add and click Add.
Click Close to exit the Add Supervised Participants/Groups dialog.
Note
Enterprise Conduct allows the supervisor to sort the list of participants/groups alphabetically by clicking the
 icon in the Supervised Participants/Groups window.
The participants/groups you added are listed in the Participants/Groups section. Group names will be highlighted in bold.
Adding Policies to Queues
The Add Policies section involves performing the following operations as shown below:
Add Policy by clicking the
icon.RUN
STATUS
Selecting a Sampling Profile
Selecting the Retention Period
To add a policy to a queue:
Click the
icon next to Policies.To add one or more policies to a queue, select the checkbox for the policy and click Add. The "Policy(s) added successfully" message appears in the bottom left corner of the dialog box. This new policy displays the Ready to Run status in the Policies window.
Click Close to exit the Add Policies dialog. The policies you added are listed in the Policies section.
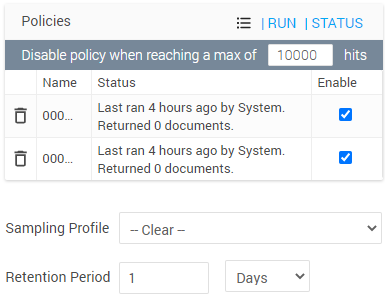
Policies are enabled by default. To disable a policy, clear the Enable check box against that policy.
Against each policy a status is displayed under the Status column. This Status lets you know when the policy ran, and the documents it has fetched. This information is explained in the Viewing Scheduled Policy Status section below.To disable a policy after it fetches a certain number of documents, type that desired number in the Disable policy when reaching a max of <text box> hits. By default, this value is set to 10000. The maximum value that can be configured in Enterprise Conduct for a queue is 1 million.
Select a Sampling Profile from the list of configured profiles. For information on configuring Sampling Profiles, see Configuring Sampling Profiles.
Select a Retention Period for the Queue from the drop-down as Day(s), Month(s), or Years(s). Setting a Retention Period will create a Conduct Retention policy for the queue. For more information on Conduct retention policy behavior, refer the Conduct Retention Policy section.
Conduct Queue Retention Period
A Conduct queue retention period is associated with every Queue configured in Conduct application, and has the following characteristics:
The Conduct Queue retention period is set to 30 days by default.
The Conduct Queue retention period for new queues can be set to any value from 0 to 9999999 days. For existing queues, this value can be changed to any non-zero value from 1 day to 9999999 days.
There is a special connotation associated with setting zero as the Queue retention period. If the Queue retention period is set to zero, the document is retained as long as it is not marked as Closed in a Queue. Hence, zero days should not be used unless specifically required for this use case.
Important
Conduct queue retention is calculated based on the Queued time of a document.
Retention of any document is governed not only by the set Conduct Queue retention period, however also by Case management holds, Participant holds, and Enterprise Conduct retention policies.
The ability to edit the Retention Period is limited exclusively to roles with specific granular permission. A queue creator can only change the queue retention period from the default value during queue creation. After that, only the admin with the permission "Edit Queue Retention Period" can modify it for queues with edit access. Other users can see the retention value but cannot edit it.
Smarsh recommends that only a select few users are given the role of editing the queue retention period. This permission can be enabled through the Administration > Roles configuration page. To ensure uninterrupted business operations for existing customers, all queue administrators with "Queue Edit All" permission have been granted the role. However, it is important to disable this permission when it is not required.
Manual Run of Conduct Policies
Important
The Manual Run feature may not enabled by default for multi-tenant environments. Contact Smarsh Support for more info on getting this enabled.
Manual Run Recommendations
It is recommended to initially only perform Manual runs for a single day time - period and gradually increase up to the maximum allowed limit of 7 days.
The use of Manual Runs beyond the last 3 days (for a maximum period of 7 days) requires creating additional indices in the environment, and may lead to possible overages and additional costs. Hence, Manual runs should be used consciously.
Changes to Queue and Policy configurations (including List Library changes) during a Manual Run will result in failures and require re-submission. Any configuration changes should not overlap with Queue runs.
Enterprise Conduct also gives users the ability to perform a manual run of Policies(s) for historical data based on the selected time period. Important aspects of the Manual Run feature are:
Manual Run requests at any given time, can be submitted for a cumulative maximum of 7 days across all queues. For example if Manual Run A is for 3 days and Manual Run B is for 3 days, Manual Run C for 2 days will not be allowed as the cumulative maximum of A + B + C (3 + 3 + 2 = 8) is more than the allowed 7 days.
Once the existing or In-Progress Manual runs are completed, new Manual run requests can be submitted. This is to ensure better completion rates for the submitted Manual runs and thus improved traceability.
The ability to perform manual run will only be possible for any of the following scenarios:
The user is the queue creator.
The user is the queue administrator.
The user's role has the Full Edit Access for all Queues permission enabled.
The RUN option will be greyed out for users who do meet the above criteria. In cases where the RUN option is not greyed the error "The user does not have the appropriate permissions to perform manual runs." will be displayed.
The ability to view manual run status will only be possible for any of the following scenarios:
The user is the queue creator.
The user is the queue administrator.
The user's role has the Full Edit Access for all Queues permission enabled.
The user's role has the View Access for All Queues permission enabled.
The manual run will not occur immediately, however will be prioritized based on the other scheduled policies, and other manual run operations that have been initiated.
The status of Manual runs submitted will be displayed for a 7-day time period only. Any Manual runs that could not complete within this period may not be verifiable in the Status pane.
The user can select from a list of Flag policies only that have been added. Ignore policies will not be listed here.
Sampling profiles will not be considered for the Manual Run operation.
On breaching the circuit breaker limit for any of the day-wise operations, the status will display a failed alert message.
To perform this operation ensure the desired policies have been enabled from the Policy workspace. To initiate this process.
Click RUN in the policies panel. The Manual Run dialogue appears.
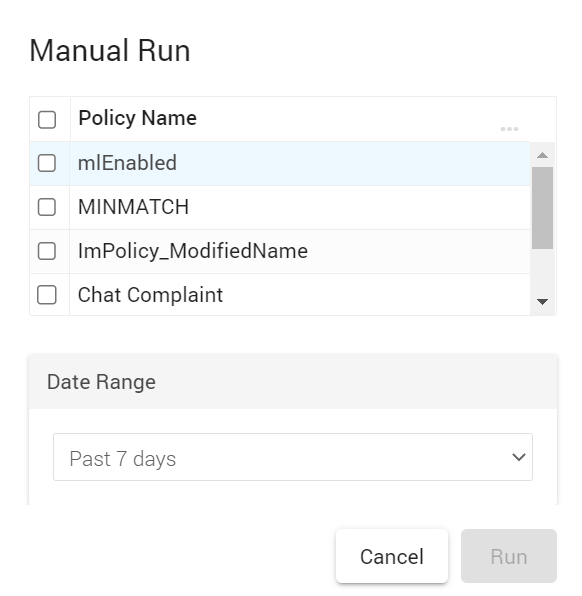
To add the desired policies, select the checkbox to the left of the listed policies.
Select a Data Range to specify the time period for the historical data against which the selected policies will be run, from the following options:
- Today
- Yesterday
- Past 7 days - the application will consider 7 days from the previous day. This is the default date range.
- Custom Date - Allows you to set a start and end date for the historical data with a maximum range of 7 days only.
Important
The Custom Data range will populate data by default for the last 90 days only. This is a configurable value. Contact Smarsh Support to have this configured.
To specify a search period of 24 hours, select the To date first and then the From date. For example to specify a search period for only July 05 2022, first select the To date as 05/07/2022 and then the From date as 05/07/2022.
Click Run to initiate the Manual Run operation. You will get a pop-up displaying the status of the request.
Click the Status option next to the Run option to view the complete status of the Manual Run policies as shown in the figure below. This window will display the status of the Manual Run policies split by day-wise count of documents. For example for a date range of July 05 - July 12. The policy run will be split into single day runs (05 - 6, 06 - 07, 07 - 08, 08 - 09, 09 - 10, 10 - 11, 11 - 12).
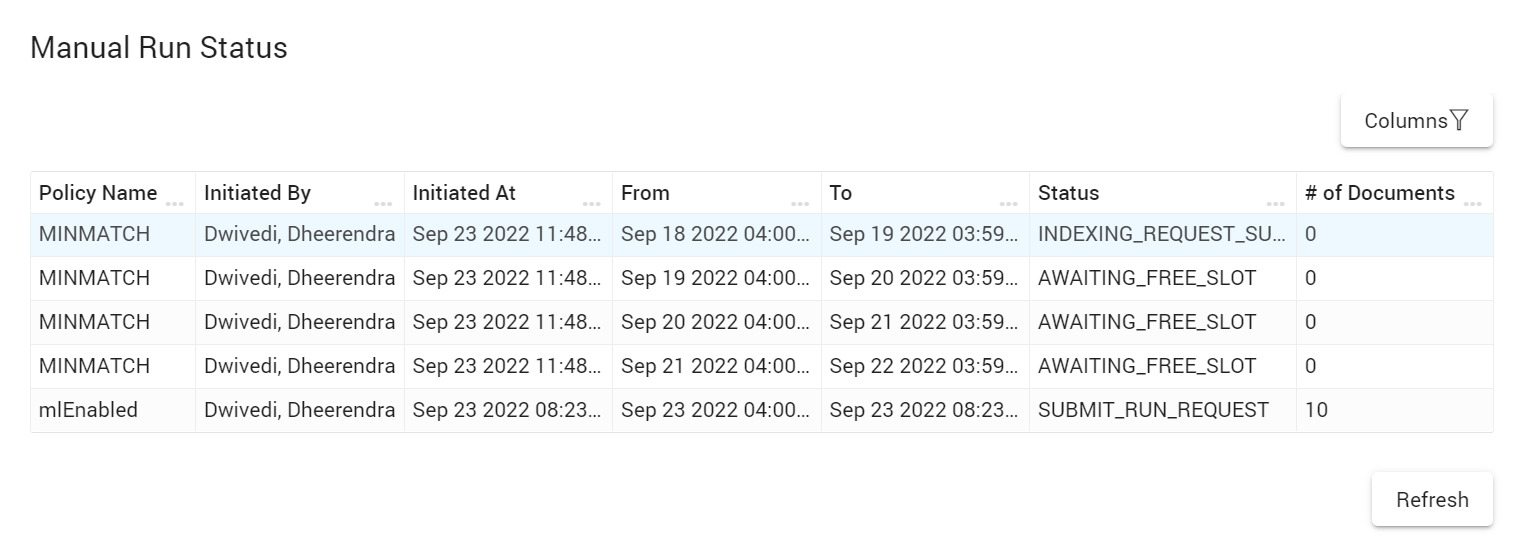
The policy Status window for the Manual Run policies will contain the following columns:
|
Status |
Definition |
|
Policy Name |
Name of the policy that was applied. |
|
Initiated By |
This column lists the name of the person who initiated the Manual run. |
|
Initiated At |
This column displays the start date/time for when the Manual Run was initiated. |
|
From |
This column displays the start date for the 24 hour time period. |
|
To |
This column displays the end date for the 24 hour time period. |
|
Status |
This column indicates the status of the Manual Run in separate rows. Each row will list the status for the selected polices for a 24 hour period.
|
|
# of Documents |
This column indicates the number of documents that were returned for the selected policy, within the selected date range (split into 24 hour time periods). |
Manual Run Policy State Transitions
Manual Run policies will execute as explained below:
When a scheduled run is being executed, or is scheduled to run within the next 3 hours, then any Manual Run will remain in the AWAITING_FREE_SLOT state and will move to the next state only after the scheduled run is complete.
When a Manual Run is being executed, any subsequent Manual Run requests will move to the AWAITING_FREE_SLOT state until eligible to move to the next state.
Manual Run may also remain in the AWAITING_FREE_SLOT, until index entries have been created for the required dates.
When a Manual Run is eligible to execute, it moves to the SUBMIT_RUN_REQUEST state.
Manual Run for Gold Dataset
To perform Manual Run on documents that are part of the Gold Dataset cluster:
Select the Gold Dataset checkbox from the Manual Run window as shown below:
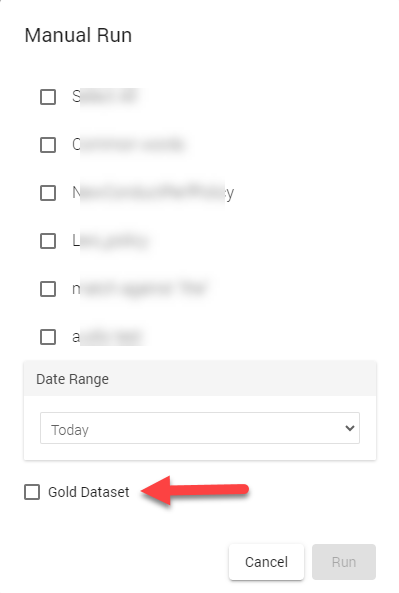
Select the appropriate date range based on when the Gold Dataset cluster was provisioned. You can determine the date of ingestion from the Ingestion Logs menu in the Archive Management tab, and searching by the desired Gold Dataset cluster. For more information on how to search, refer the Viewing Ingestion Logs by Cluster topic.
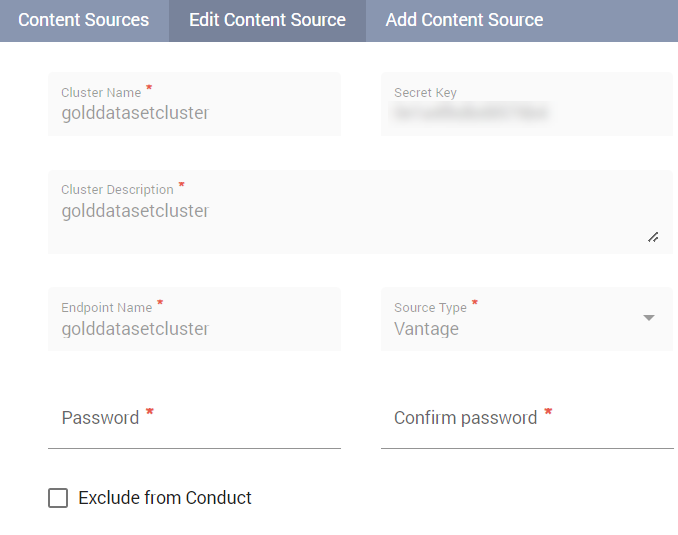
What is golddataset Cluster?
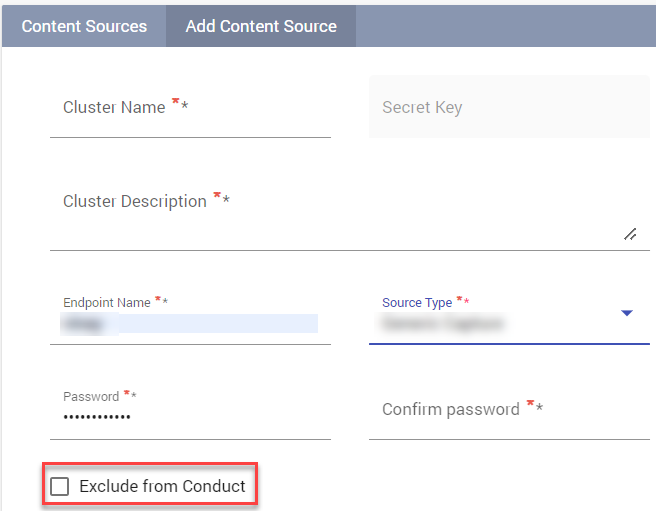
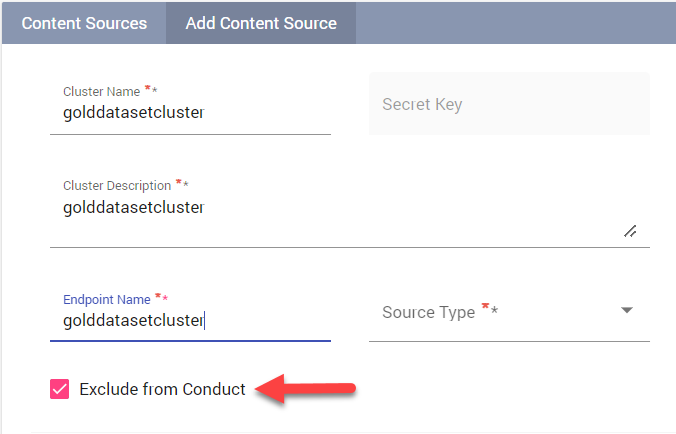
The golddataset cluster is an exclusive content source, that is setup from the Content Source section in the Archive Management tab. For more information creating a content source, refer the Configuring the Content Sources topic. A sample screenshot of a golddataset content source configuration page is shown below:
What are golddataset Cluster Limits?
The golddataset cluster will have the following size limts:
The maximum allowed size of the golddataset cluster is 3 GB or 10000 documents.
If the data ingested in the golddataset cluster grows to 3 GB or 10k documents, further ingestion is not allowed in this content source from Conduct.
The Exclude from Conduct checkbox in the Content Source menu will be enabled automatically as shown below:
Manual run that is triggered on Gold Dataset will continue to run on the existing or available data. The documents that have been ingested can still be searched using Archive Search, however will not be part of Conduct review and admin queues.
Important
If this restriction is overriden and the Exclude from Conduct checkbox is unchecked, this action is interpreted as a request to delete the existing Gold Dataset cluster documents and the following error message is displayed.
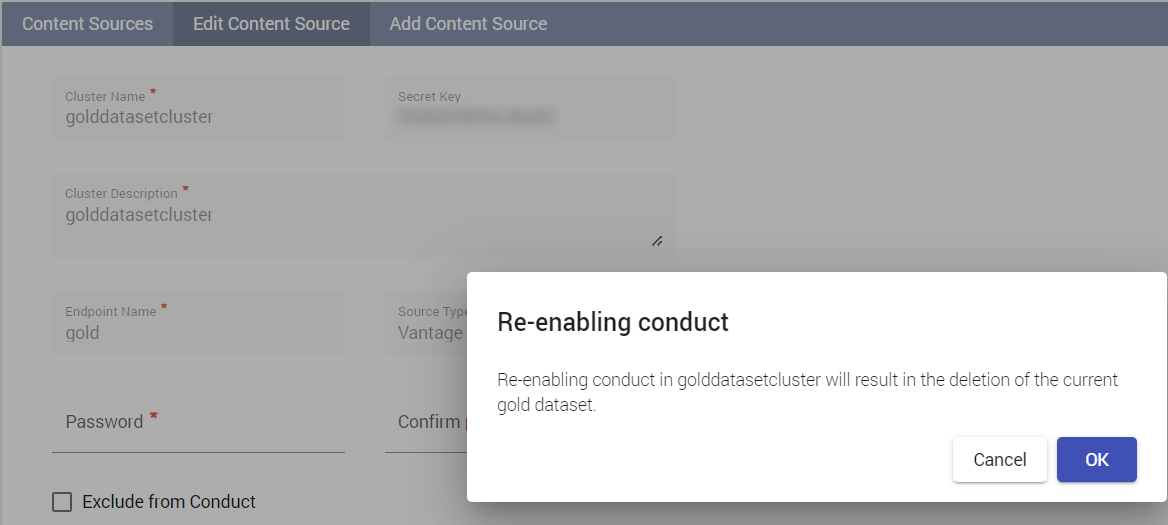
Hence the existing Gold Dataset in Conduct is deleted, and will be recreated.
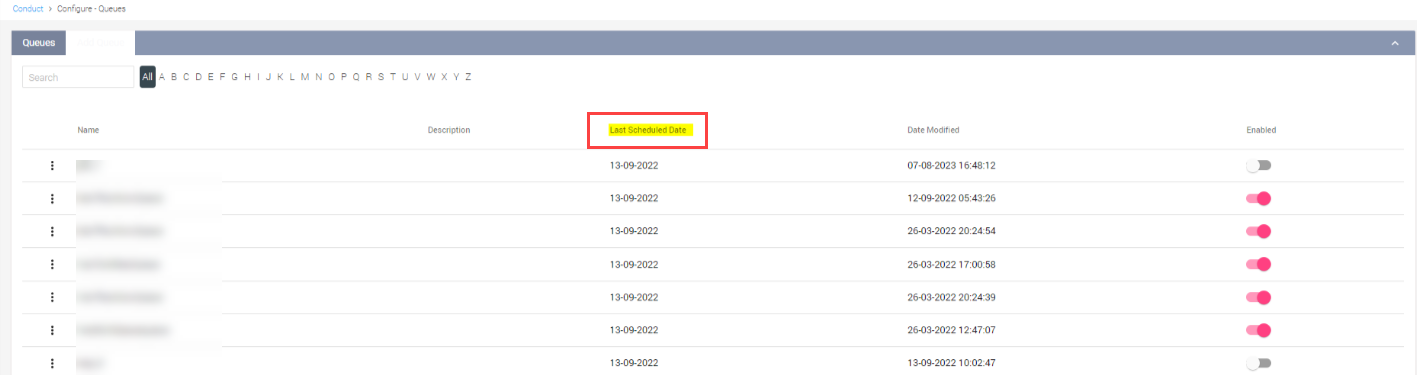
Viewing Scheduled Policy Status
The Status column in the Policies section shows you the current status of the scheduled policies. The following table describes the different statuses for a queue:
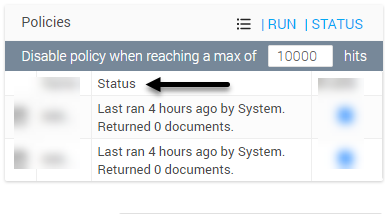
Table 14: Policy Status
|
Status |
Definition |
|
Ready to Run |
This is the initial state of a policy when it is added to a queue. |
|
Last ran <x> seconds/minutes/hours… ago. Returned <y> items. |
Once a policy runs, the Status column displays the time when it last ran and the number of items it has fetched into the queue. |
|
Disabled by <user name>x seconds/minutes/hours… ago |
This status appears when an Enterprise Conduct user disables a policy. |
|
Disabled by system |
This status appears when a policy enters a circuit breaker. For information on circuit breaker, see Queue Entering a Circuit Breaker. An email mentioning that the hits have exceeded the circuit-breaker will be sent to the user. |
Queue Entering a Circuit Breaker
Circuit Breakers are designed to limit the maximum number of documents that can be flagged/ignored by a policy for a given queue. The aim of circuit breakers is to prevent policies from unnecessarily flooding review queues, with a large number of documents. This in turn will protect the SLAs defined for Queue completion in the system.
Flag Policies: The circuit breaker limit for Flag policies is specified in Enterprise Conduct. Enterprise Conduct disables a policy when it enters a circuit breaker situation. A circuit breaker situation arises when the number of documents that a policy can fetch exceeds the maximum number of documents defined in the Disable policy when reaching a max of <text box> hits parameter. In this scenario, no documents are fetched by the policy, the policy gets disabled, and the status of the policy changes to Disabled by system, and an email notification is sent to the queue creator. For example, the criteria of a policy is such that it is able to fetch 5000 documents, but the parameter Disable policy when reaching a max of <text box> hits is set to 2000. In such a case, when the policy runs and exceeds the limit of 2000 documents, it enters a circuit breaker situation, and gets disabled.
Ignore Policies: The circuit breaker limit for Ignore policies is set to 500000 by default. This is controlled by a server property setting. If the documents being returned exceed the circuit breaker limit for Ignore policies, Enterprise Conduct will disable the Queue and issue an email notification to the user regarding the same.
Adding Sender/Recipient Information
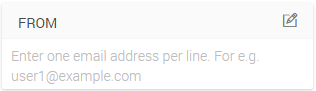
Enterprise Conduct allows you to add a list of senders/recipients in the FROM and REPLYTO text boxes provided by clicking the ![]() icon. The information entered here will be auto-populated in the Notify Sender dialog when a user performs Conduct actions. You can add multiple email addresses in separate lines in the text box as shown in the following image.
icon. The information entered here will be auto-populated in the Notify Sender dialog when a user performs Conduct actions. You can add multiple email addresses in separate lines in the text box as shown in the following image.
Enabling or Disabling a Queue
To run a queue, ensure that you enable the queue. Reviewers can view only those queues that are assigned to them in the My Review Queues page.
To enable or disable a queue:
Click the Conduct tab in the Enterprise Archive UI.
Click Queues under Configure from the Conduct workspace. The Queues page appears, and the queues added are listed.
Use the switch interface (
 ) under the Enabled column to enable or disable the desired queue. The Queue Enabled or Queue Disabled message appears accordingly.
Editing a Queue
You can edit an existing queue in Conduct.
To edit a queue, you must have the Edit All Queues permission enabled for your role.
To edit a queue:
Click the Conduct tab in the Enterprise Archive UI.
Click Queues under Configure from the Conduct workspace. The Queues page appears, and the existing queues are listed in this page.
Click the vertical ellipse (
 ) beside the respective queue to be edited. The selected queue appears.
Edit the fields you want to modify.
Click Save. The Queue updated Successfully message appears.
Important
Queue renaming behavior is explained as follows:
Enterprise Conduct allows you to save an edited queue under a different name by clicking the Save As button without any impact on queues functioning or reporting.
Certain activity reports could be impacted with this behavior.
Reporting data for renamed queues will be available based on the new names, while data before the name change can be accessed based on the older queue name.
Other editing tasks that can be performed on a queue are:
Removing a Supervised Participant/Group from a Queue
To remove a supervised participant/group from a queue:
Click the Conduct tab in the Enterprise Archive UI.
Click Queues under Configure from the Conduct workspace. The Queues page appears, and the existing queues are listed.
Click a queue to select it, the selected queue appears.
Click the
 icon (delete icon) against the participant/group name to remove the participant/group.
The Remove Item(s) dialog appears, and displays the "Are you sure you want to remove selected items from the Participants/Groups list?" confirmation message.
You can perform a bulk delete of Participants/Groups from the list by selecting the checkbox against each item or all the items, and clicking the Delete Selected button.
Click Yes. The participant is removed from the Supervised Participants/Groups list.
Click Save.
Removing a Reviewer from a Review Level
To remove a reviewer from a review level:
Click the Conduct tab in the Enterprise Archive UI.
Click Queues under Configure from the Conduct workspace. The Queues page appears, and the existing queues are listed in this page.
Click a queue to select it, the selected queue appears.
Click the
icon (delete icon) against the reviewer's name to remove the reviewer.The Remove Reviewer dialog appears, and displays the "Are you sure you want to remove <reviewer> from the reviewer list?" confirmation message.
Click Yes. The reviewer is removed from the Reviewer list.
Click Save.
Removing a Policy from a Queue
To remove a policy from a queue:
Click the Conduct tab in the Enterprise Archive UI.
Click Queues under Configure from the Conduct workspace. The Queues page appears, and the existing queues are listed in this page.
Click a queue to select it, the selected queue appears.
Click the
icon (delete icon) against the policy name to remove the policy.
The Remove Policy dialog appears, and displays the "Are you sure you want to remove <policy_name> from the policies list?" confirmation message.Click Yes. The policy is removed from the Queue.
Click Save. The modifications are saved to the queue.